Introduction to 3D Printing
Prerequisites- None
mechatronics.studio does not receive any compensation or affiliate bonuses from any of the companies described in this article. This is an independent publication.
3D printing technology evolves regularly. I will work to keep this article updated as new and interesting options enter the market. Updated- August 12, 2023.
Historical Context
Making things has always been difficult. Making things is so difficult that the science of making things has been given its own name; manufacturing.
For thousands of years, manufacturers have been making parts (typically from metal, wood, clay, concrete, or glass) using three methods; casting, cutting, and forming.


Figure 1: Humans have been manufacturing things for thousands of years with many different processes. Top Left- Metal milling, Daniel Smyth | Top Center- Concrete mixing, Joko Narimo | Top Right- Wood routing, Anna Shvets | Middle Left- Coth cutting, Cottonbro Studio | Middle Center- Clay turning, Mikhail Nilov | Middle Right- Metal casting, Bruno Tzuc Tun | Bottom Left- Epoxy casting, Thirdman | Bottom Center- Metal forging, Tima Microschnichenko | Bottom Right- Metal turning, Tima Microschnichenko
Compared to these other methods, 3D printing is a very young manfucaturing process. The first patents for a 3D printer were granted to Charles Hull, a founder of 3D Systems Corporation, in 1984. The fundamental idea of 3D printing is that starting from raw materials, material is added and organized onto iteself (often in layers) to form three dimensional objects. For this reason, 3D printing is also referred to as additive manufacturing.
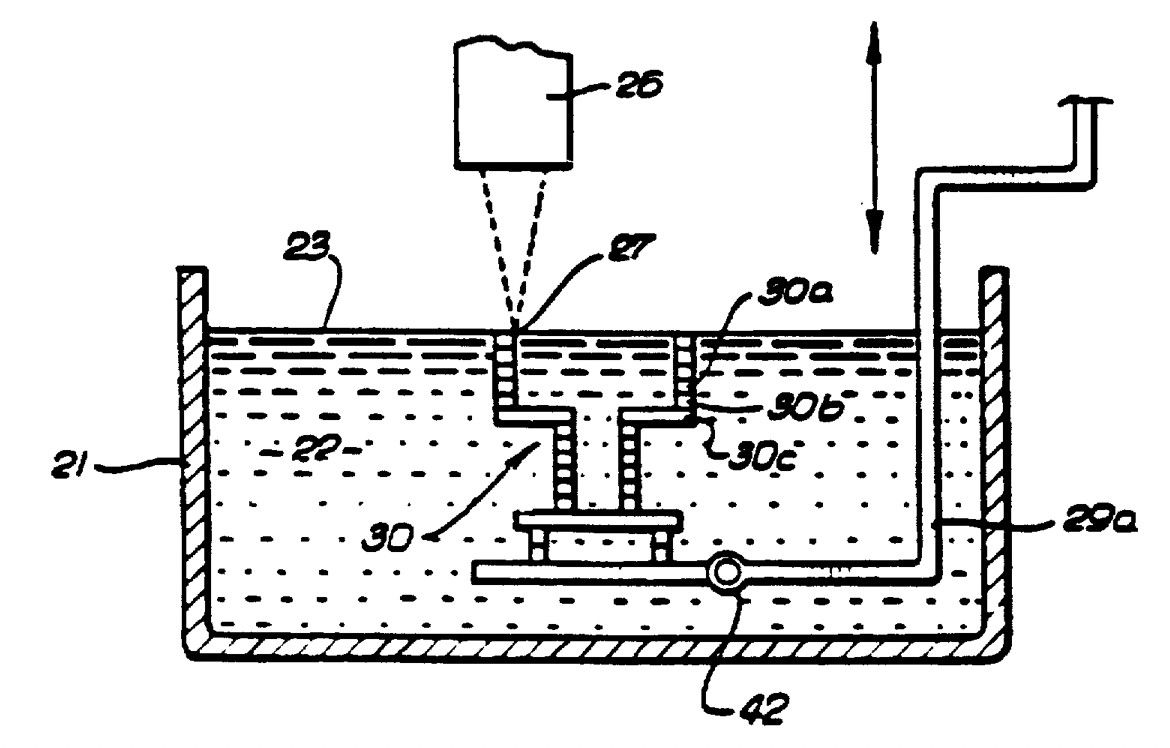
In patent US5785918A, "Method and apparatus for production of three-dimensional objects by stereolithography", Charles Hull envisioned manufacturing parts by using a moving laser beam to harden photosensitive liquid plastic; he called this process stereolithography (SLA). The process was effective, but the first commercial 3D printers cost hundreds of thousands of dollars.
A demonstration of the printing process is shown in Figure 3 below using an alternative to stereolithography called fused deposition modeling (FDM).
The two major players in the early 3D printing industry, 3D Systems Corporation and Stratasys, invested heavily in research and development and filed for patent after patent after patent. They defended their industry fiercely, essentially locking out any would-be 3D printing enthusiasts by preventing the development and sale of any competing 3D printers of any kind.
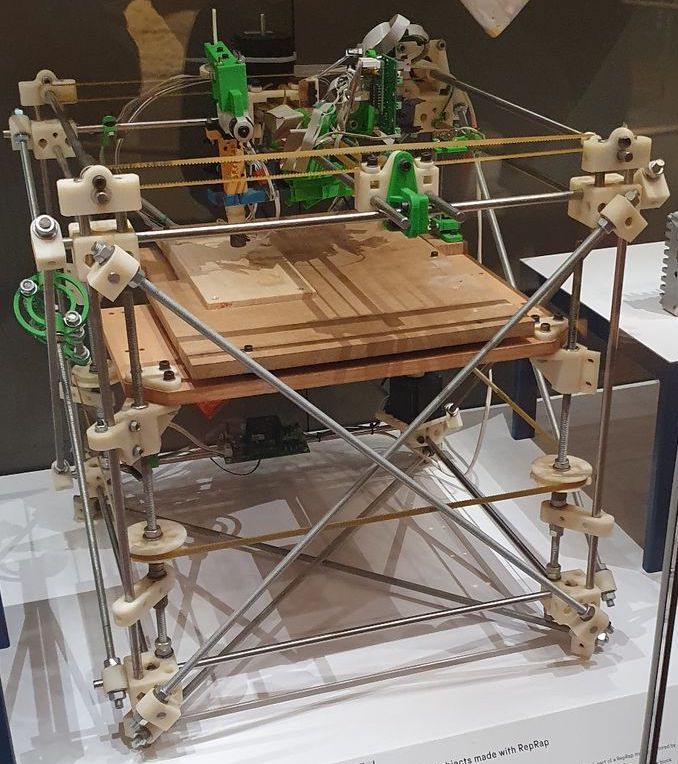
In 2005, the open source RepRap movement was started by Dr. Adrian Bowyer at the University of Bath in England. RepRap printers were homemade fused deposition modeling printers designed and fabricated by engineers and enthusiasts enthralled with the idea of creating affordable 3D printers that could make parts for... more 3D printers! Because of the afformentioned litigous companies defending their patents, this movement did not immediately produce any commercially viable 3D printers for the average consumer.
In October of 2009, the first patent for fused deposition modeling, US5121329A, "Apparatus and method for creating three-dimensional objects", expired. Since then, 3D printing technology has exploded. It's astounding how a 20 year old technology gains so much traction when the general public is actually allowed to use it.
Today, a productive 3D printer can be bought for \$200 instead of \$20,000. As 3D printing patents continue to expire, newer and newer technologies can be adopted by 3D printer makers and the general 3D printer user gains ever increasingly advanced capabilities.
The ultimate aims of 3D printing is captured well in science fiction. Matter replicator technology, depicted in Star Trek television shows, is capable of rapidly generating any object (toys, food, tools, etc.) from their native constituent elements. The ultimate manufacturing process.

3D printing Technologies
Today, most 3D printing is centralized around the production of plastic parts, which will be the focus of our discussion. Metal 3D printing is still a niche and expensive process. Food printers exist but are specialized devices (mostly used for chocolate). Many other kinds of printers are possible and in development but none have yet achieved the popularity of plastic 3D printers.
Plastics are organic compounds made up mostly of carbon and hydrogen. Oxygen, nitrogen, silicone, fluorine and other less common elements may also be present. Long chains of molecules interact and twist about each other, resulting in relatively strong and flexible materials we can use to make things. There are two main types of plastics, thermoplastics and thermosets.
Thermoplastics are plastics that are normally solid but melt and flow when heated (typically from 200$^{\circ}$C to 300$^{\circ}$C). They can be melted and solidified multiple times as long as the temperatures aren't so high as to cause the plastic to burn or degrade.
Thermosets are plastics that start out as liquids called resin. By exposing thermosets to curing chemicals, ultraviolet light, or moisture, the resin transitions from liquid to rigid plastic.
3D printing techniques have evolved to make parts from both thermoplastics and thermosets. Thermoplastics are commonly 3D printed by Fused Deposition Modeling (FDM). Thermosets are commonly 3d printed by Stereolithography (SLA). I have used both kinds during product development; each comes with certain advantages and disadvantages.
Fused Deposition Modeling (FDM)
When most people refer to 3D printing, the first process that typically comes to mind is Fused Deposition Modeling (FDM). The principle of FDM is actually really simple. A roll of plastic wire, called filament, is gripped by a pair of rotating gears called an extruder, shoved through a heater and nozzle, then deposited onto the bed of the printer. A computer controlled gantry moves the nozzle around the print bed along the X, Y, and Z axes. This process is depicted in figure 6 below.
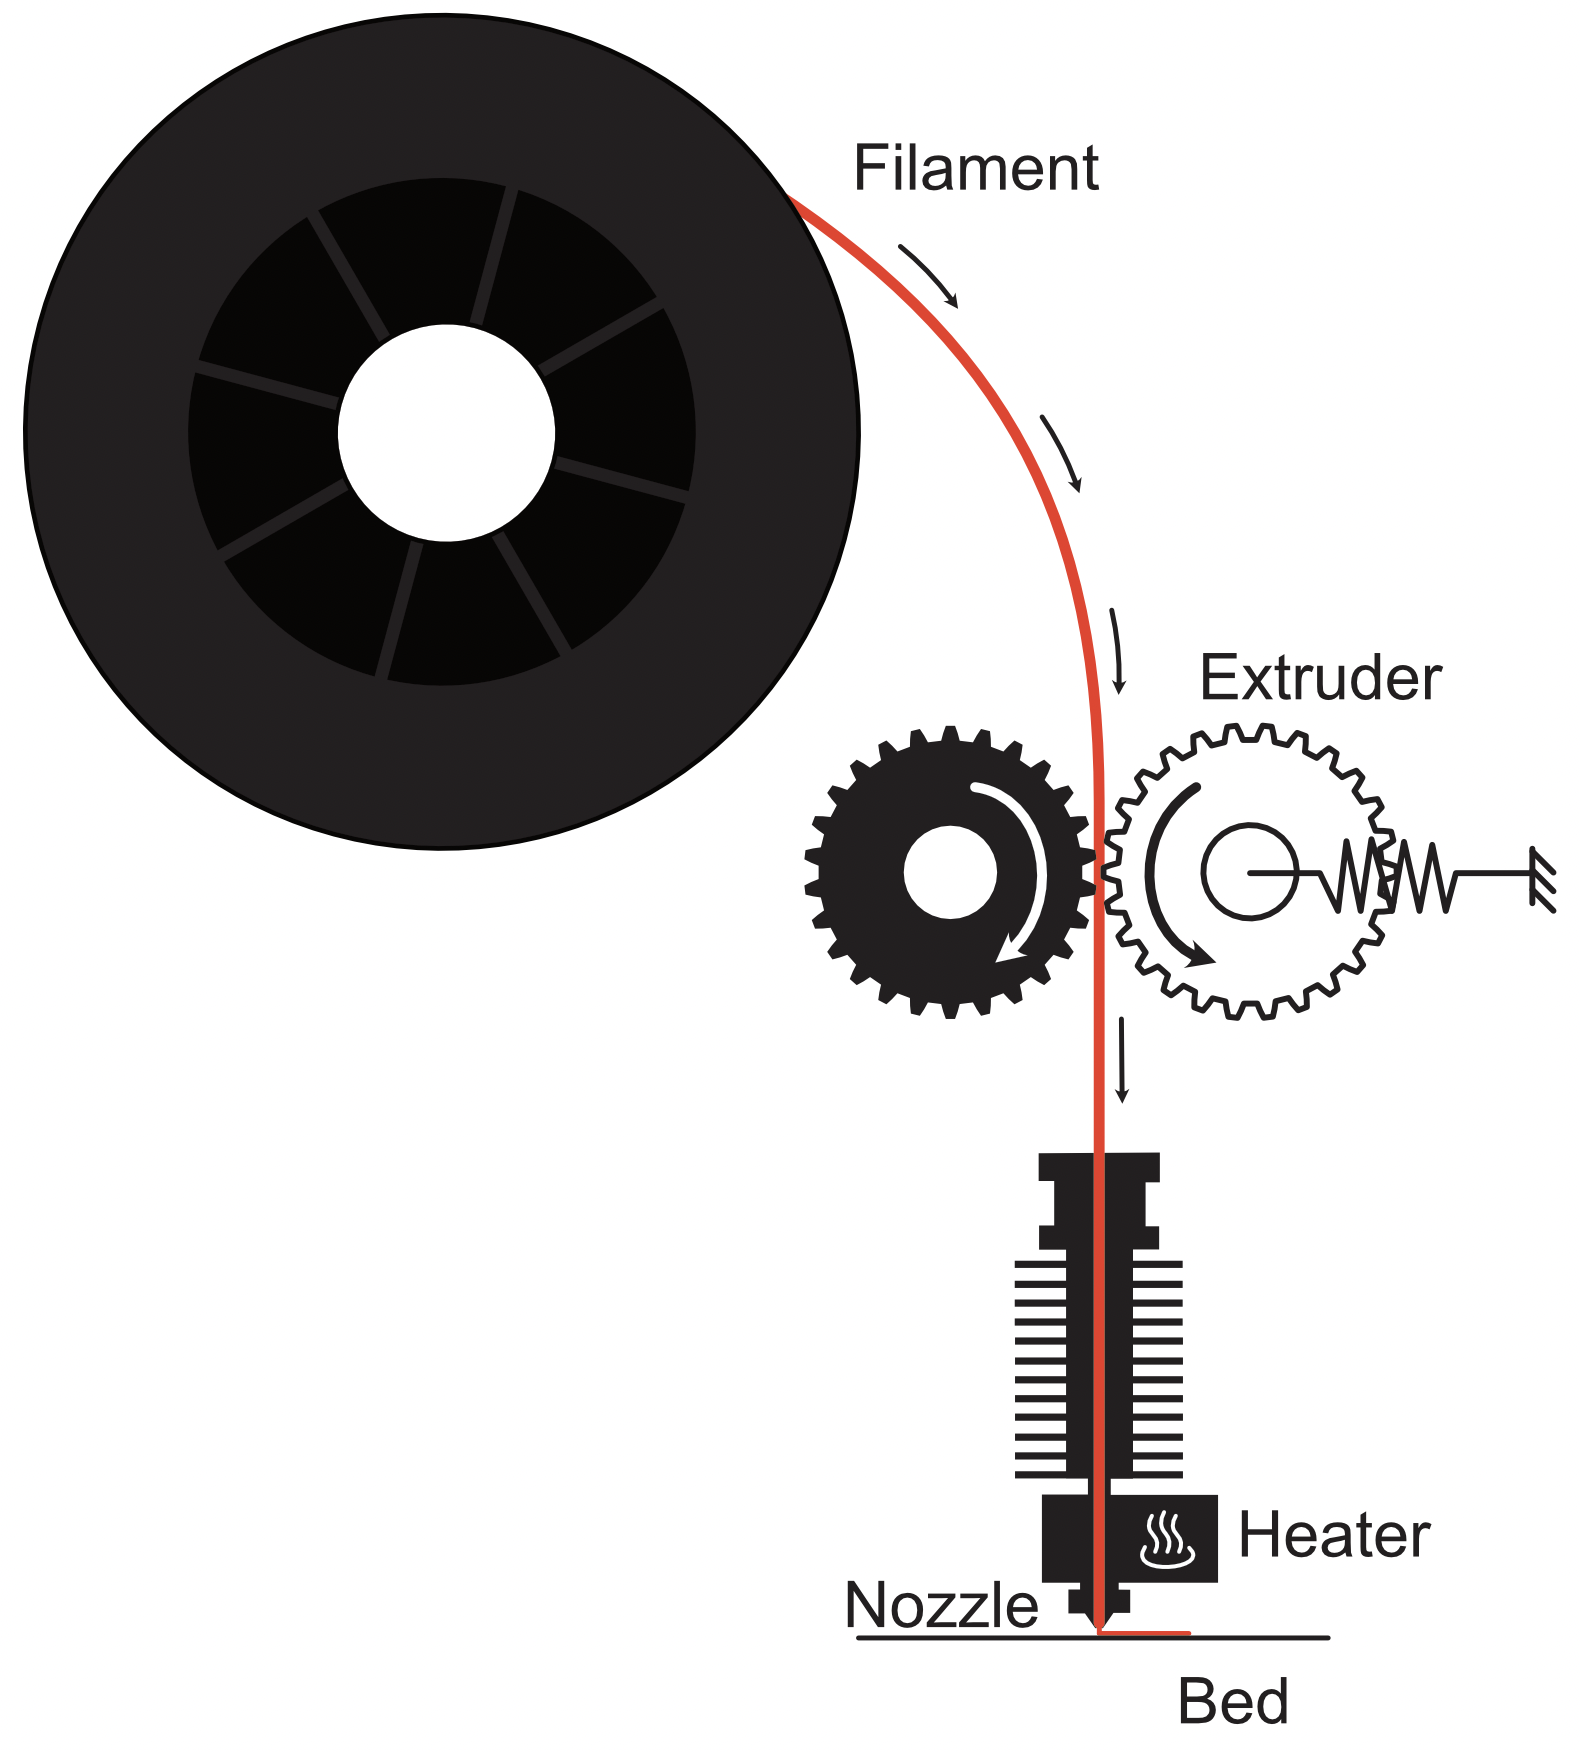
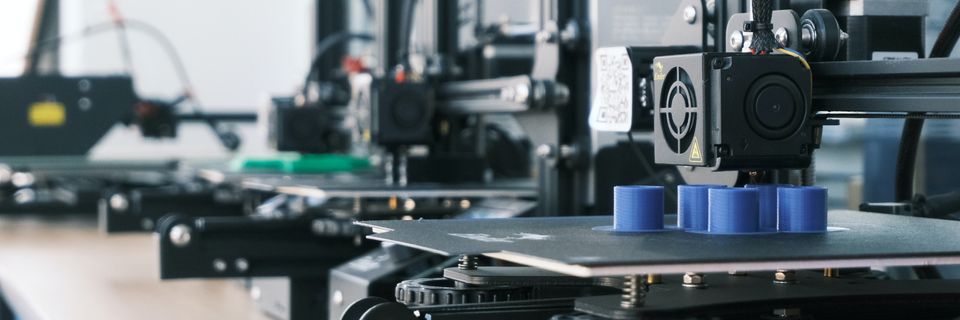
Figure 7 below depicts a fused deposition modeling 3D printer in action with each of the fundamental components labeled.
Though the concept is simple, producing good parts with this process is actually quite difficult. Getting good adhesion of the first layer to the bed is particularly challenging. Parts are often not square or the right size. The print head vibrates which causes ringing. Extrusion defects (due to inconsistent feed, waterlogged plastic, etc.) cause bulging and bubbles.
Over the past decade, the open source community and 3D printer manufacturers have gotten pretty good at making FDM 3D printers that work reliably and produce reasonably good quality prints.
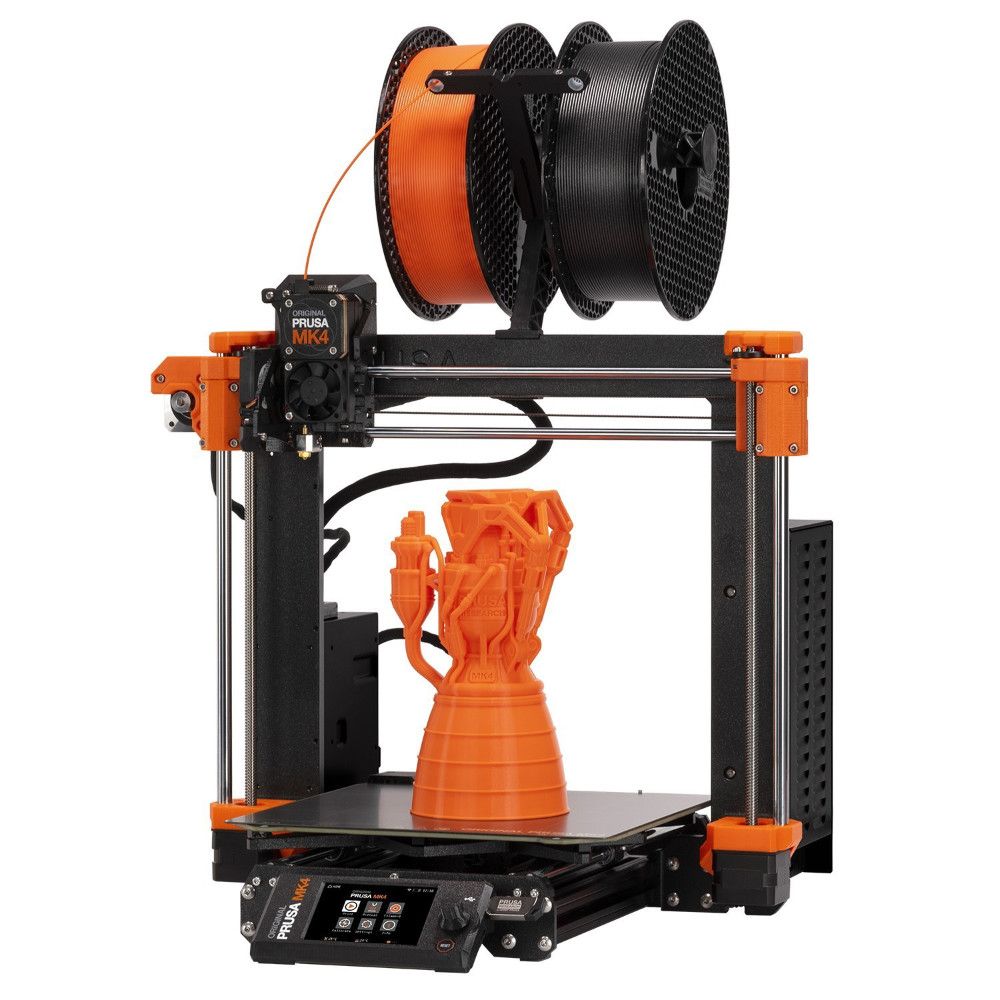
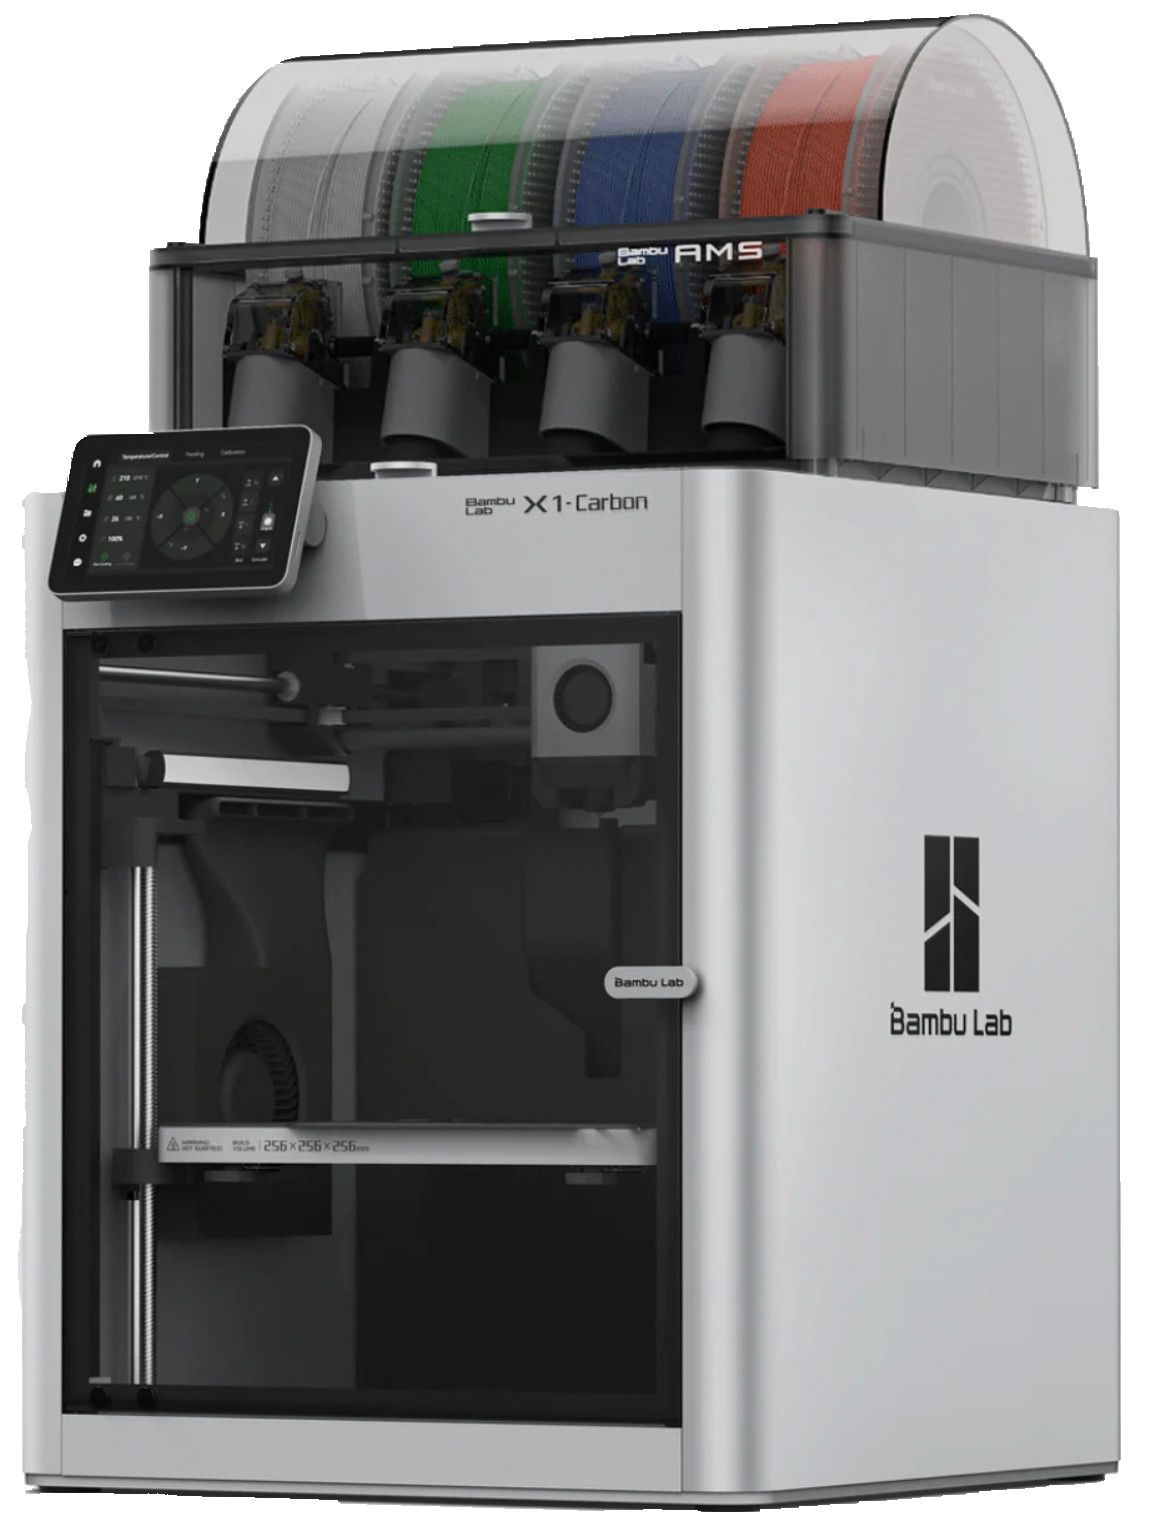
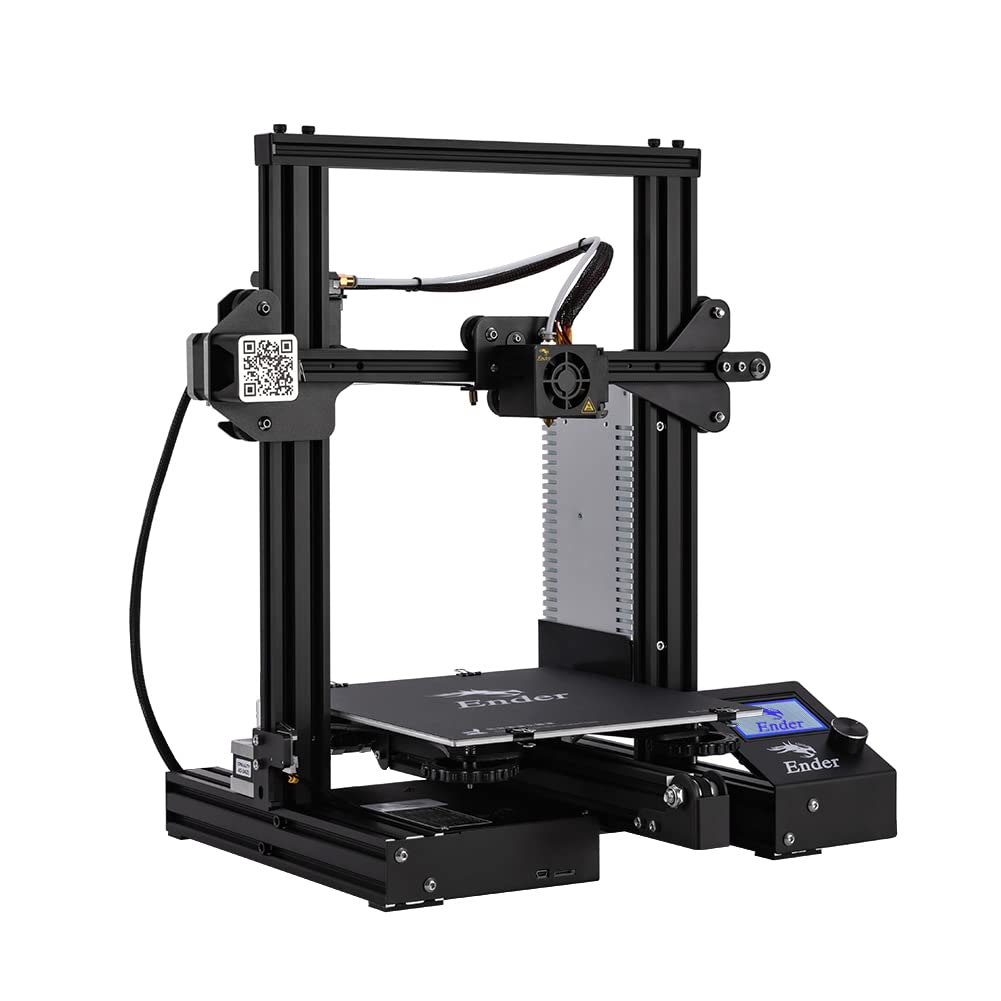
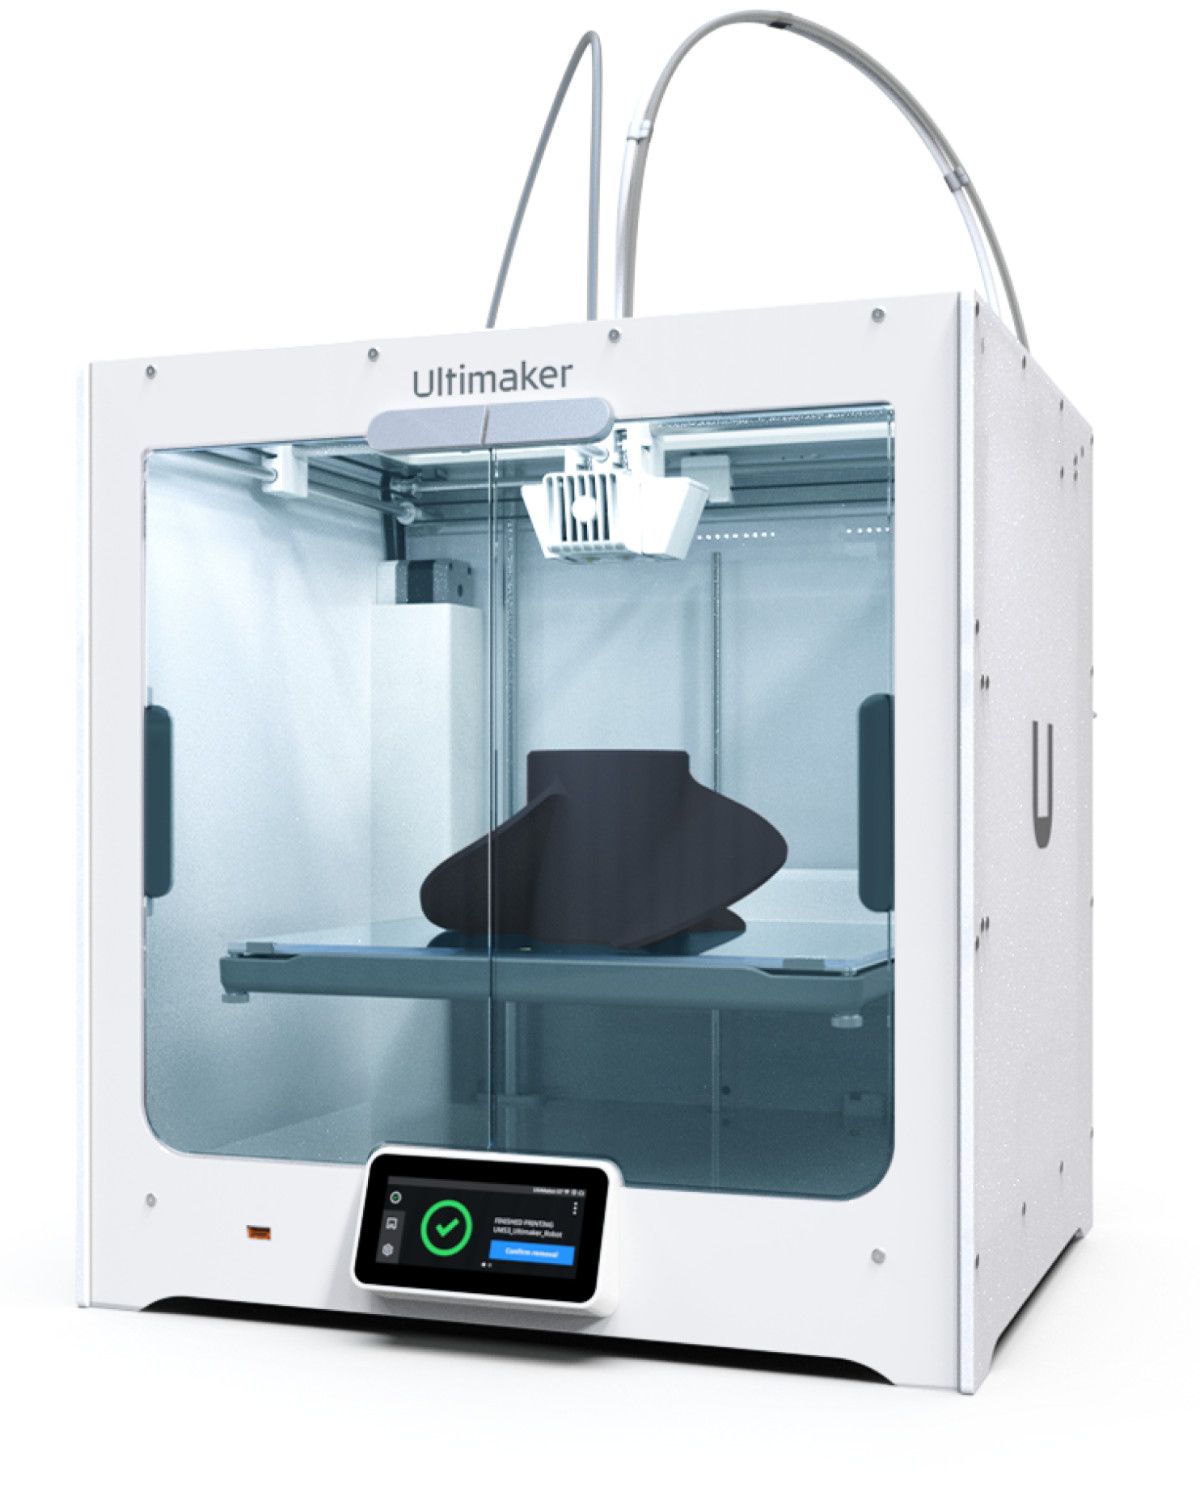
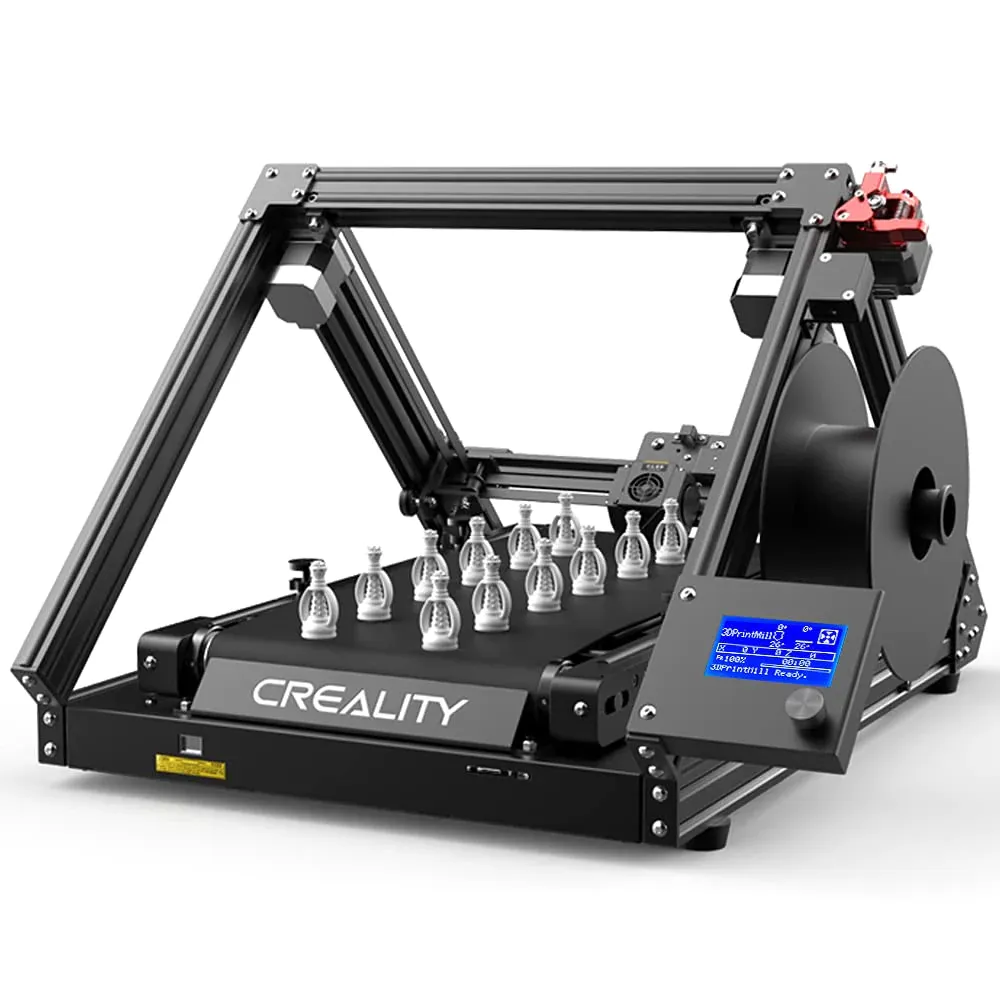
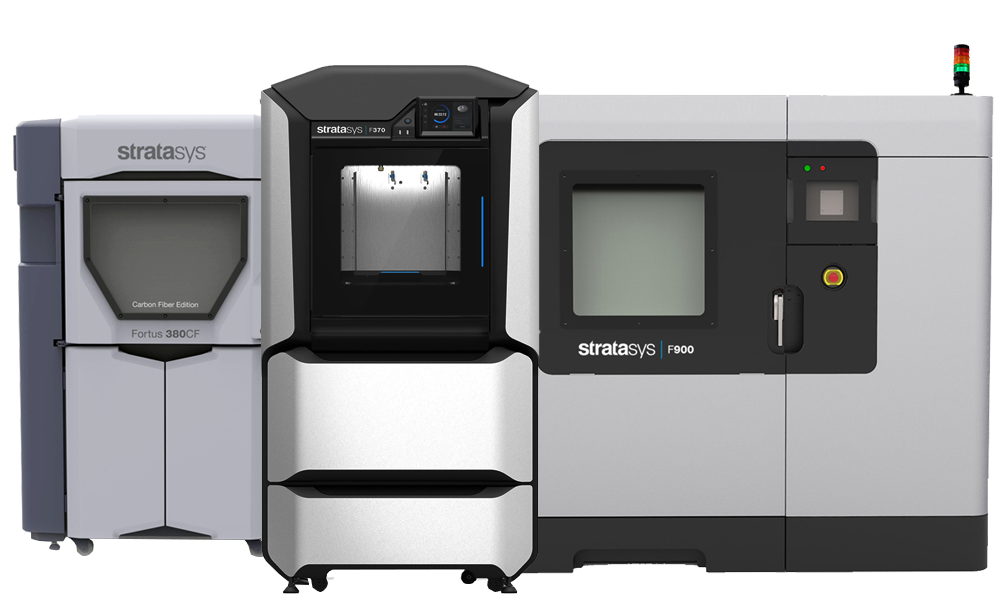
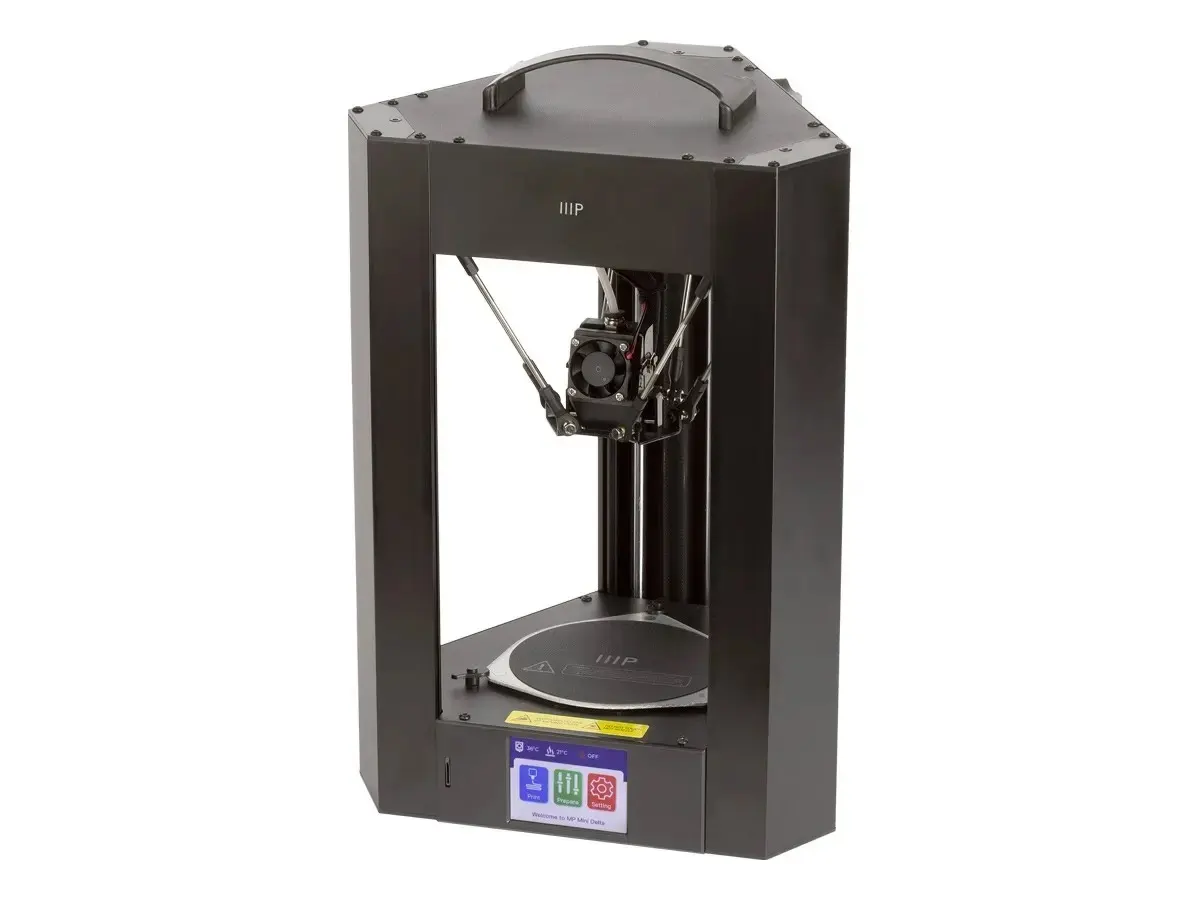
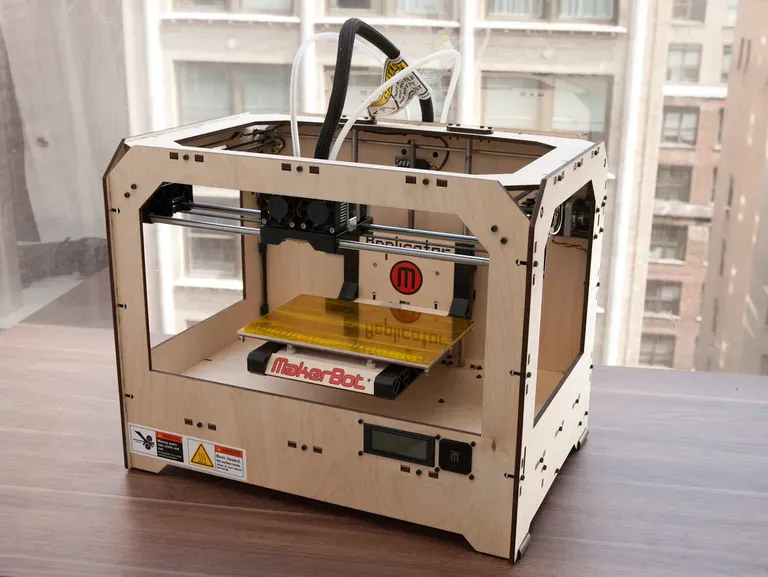
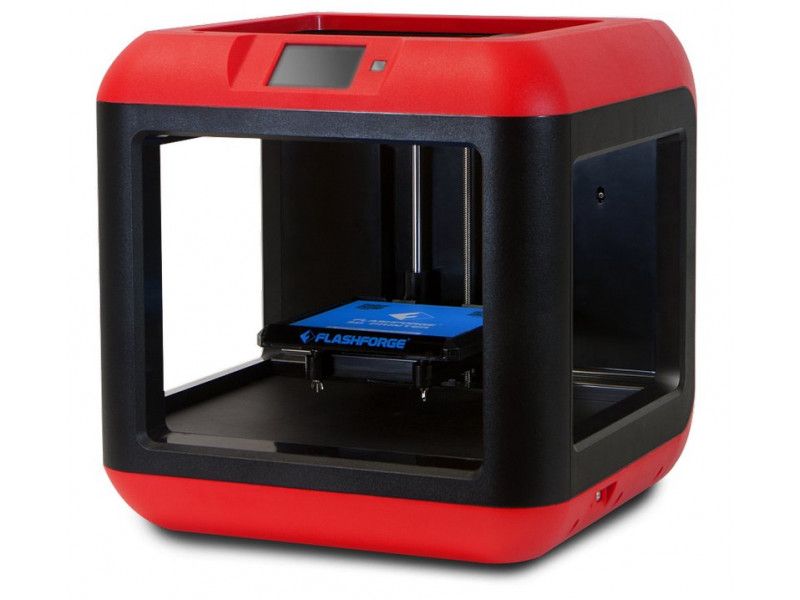
Figure 8:Top Left- Prusa MK4 | Top Center- Bambu Labs X1 Carbon | Top Right- Creality Ender 3 | Middle Left- Ultimaker S5 | Middle Center- Creality CR-30| Middle Right- Stratasys FDM Assortment | Bottom Left- Monoprice Mini Delta | Bottom Center- Maker Bot Replicator | Bottom Right- Flashforge Finder
In future articles, we will discuss FDM printing fundamentals and the benefits certain feature provide.
Beyond just owning a machine, a 3D printer requires some additional work to actually use it. The full FDM printing process is shown in figure 9.

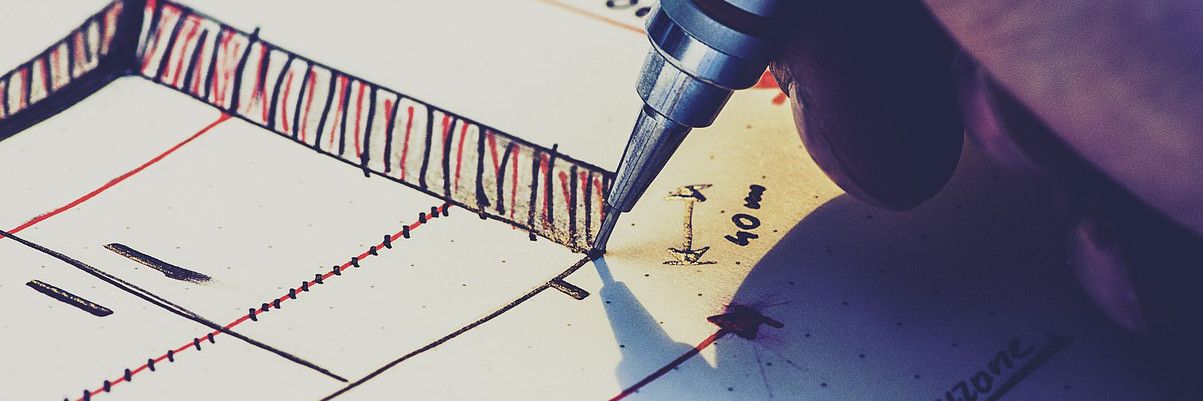
With an idea in mind of what you'd like to print, you'll need to create a digital model of that idea so that the printer knows what to make. Many models are created using Mechanical CAD software (see linked article below), though when modeling more organic things (like animals or people), other software might be used.
After the model is complete, it is exported (typically as a .stl file) and opened in software called a slicer. The slicer converts the model into instructions for the 3D printer, called G-code. The printer follows these instructions to print the part.
Stereolithography (SLA)
Stereolithography (SLA) printing was invented before FDM printing but is today less common. There are a number of drawbacks to SLA printing (discussed later in this article) but the achievable detail of SLA printing far surpases FDM printing.
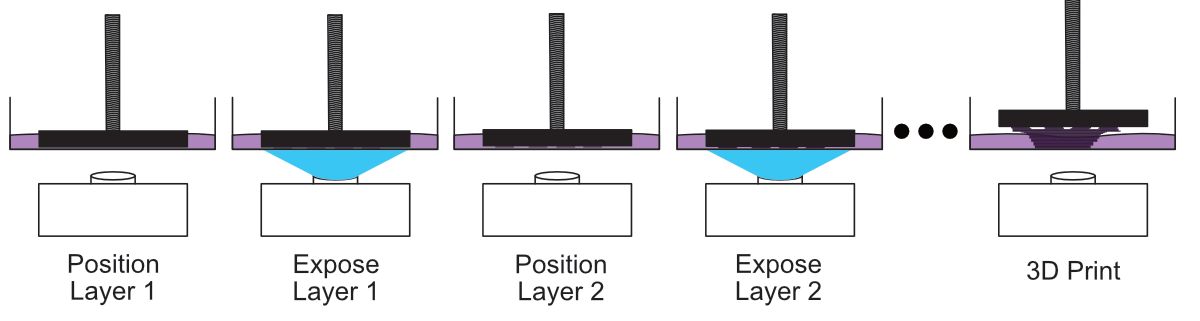
During the SLA process, an ultraviolet projector or ultraviolet laser is exposed onto a vat of liquid thermoset resin. The light causes the resin to cure and harden onto the bed. The exposure pattern of the projector or laser causes the resin to cure into the desired shape. After each layer, the build plate is raised and exposure for the next layer begins. The SLA process is depicted in figure 10.
The general product architecture of SLA printers has largely converged. Most consumer SLA printers look similar and without being emblazoned with company branding the average maker would be hard-pressed to tell them apart. This isn't to say that new and improved SLA printers aren't regularly getting released, the improvements are just iterative rather than revolutionary.
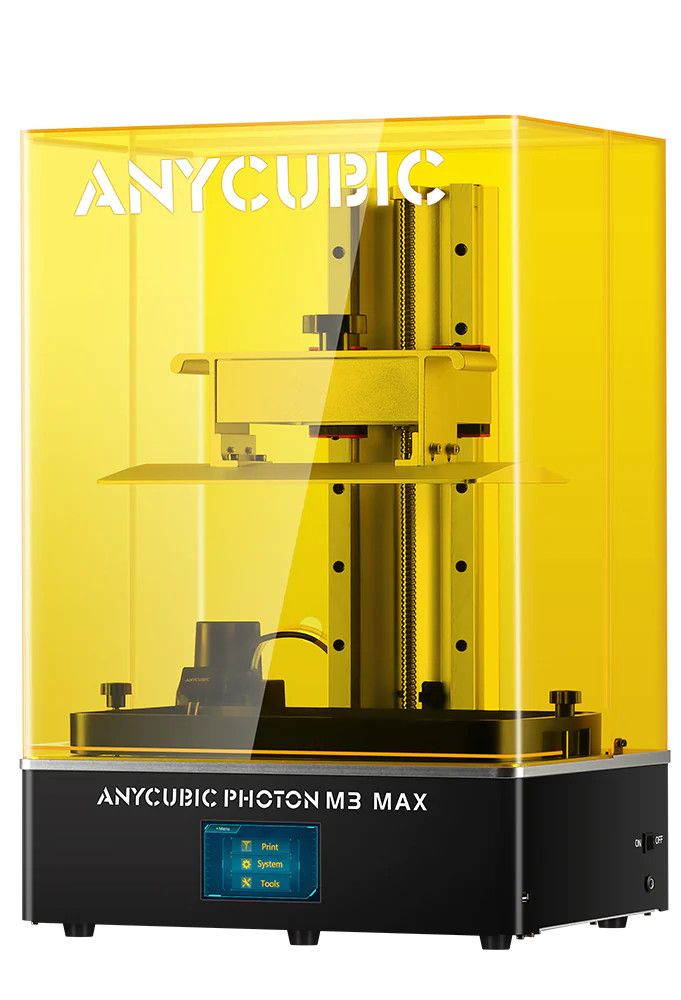
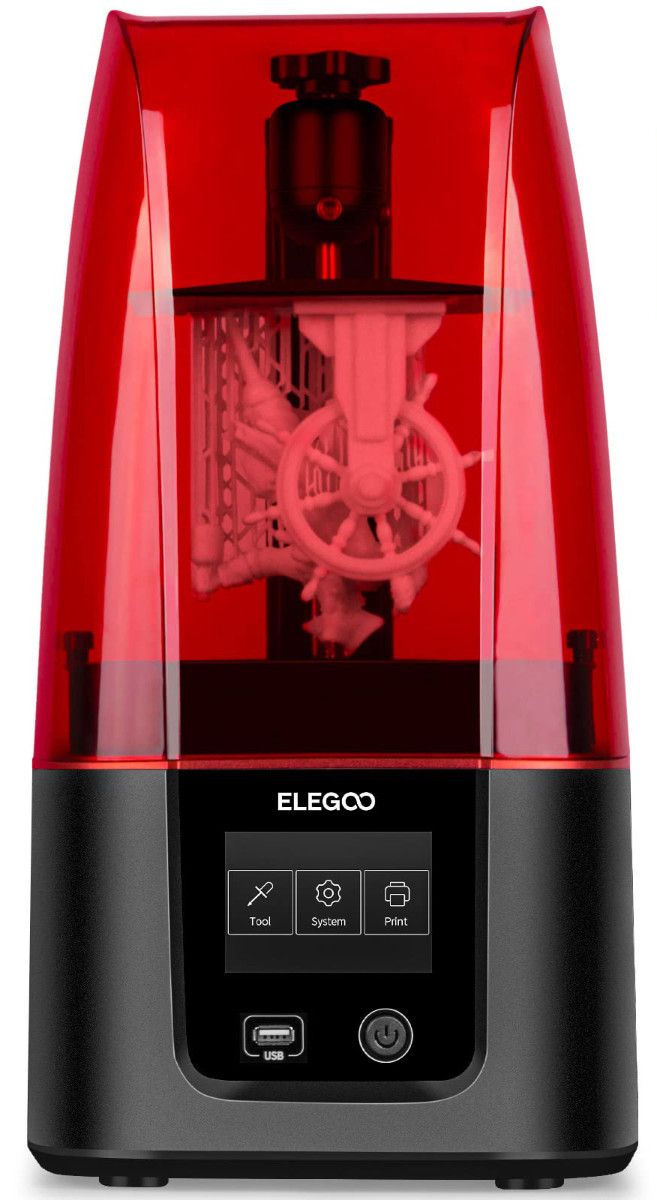
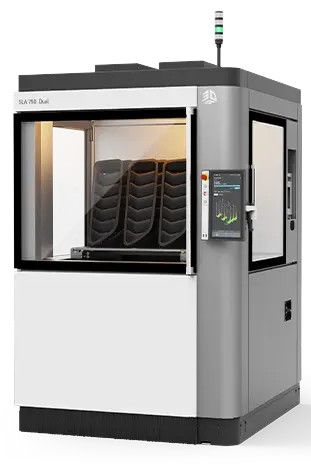
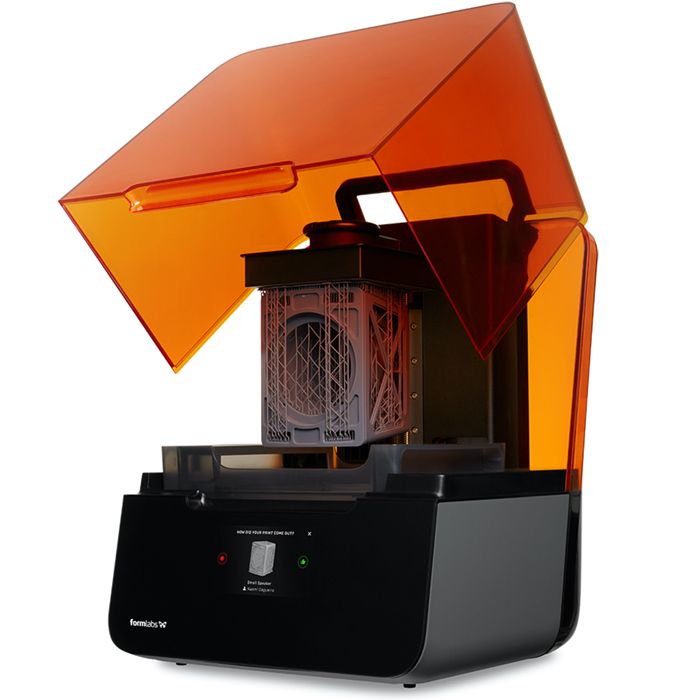
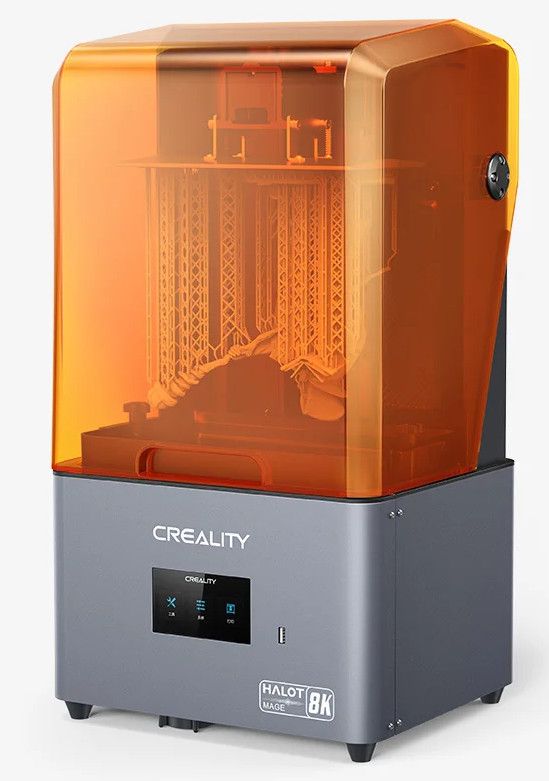
Figure 11:Top Left- AnyCubic Photon M3 Max | Top Center- Elegoo Mars 3 | Top Right- 3D Systems SLA 750 Dual | Bottom Left- Formlabs Form 3 | Bottom Right- Creality Halot Mage
Similar to FDM printing, SLA printing requires a few steps beyond simply pushing a button and getting out prints. Slicing is a little different in SLA (SLA printers don't use G-code) but the idea of converting a model to machine instructions is still true.

After the print is complete, the SLA process requires a few additional steps beyond the print; the printing process itself does not fully cure the resin. After the printing process is finished, excess liquid resin needs to be cleaned off the print in an isopropyl alcohol (IPA) bath and then the print needs to be exposed to additional UV light to complete the cure (typically 30-120 minutes).
Cleaning is often done by washing the print in a simple plastic container filled with IPA. Small brushes (like a toothbrush) can be used to help clean residual resin off the print. Automated bath mixers or ultrasonic baths can be used to automate the cleaning process.
The final curing can be done with any UV light source, even sunlight. Importantly, the print needs to be rotated so that all surfaces of the print are exposed to UV light for curing. Putting a print out in the sun and manually turning it can be tedius; most invest in a dedicated curing chamber with a built in UV light source that automatically turns the print for even curing.
FDM vs SLA Head-to-Head
Every maker looking to 3D print needs to make a difficult decision; FDM or SLA. Each method has its own advantages and disadvantages.
Most who choose FDM do so because it is clean and produces strong and tough parts, even with standard materials. The part quality is acceptable and parts are functional.
Most who choose SLA do so because the visual quality of the parts is outstanding. They accept the additional burden of the mess along with cleaning and curing parts in order to get the best visual quality possible.
Some makers have printers for both methods and choose the best 3D printing process for their current project. Below, the two processes are compared together for a variety of criteria.
Cleanliness (Winner: FDM)
Because uncured resin is a liquid, it gets everywhere. SLA printer users work very hard to keep their space clean and in the process go through a lot of rubber gloves, table coverings, and paper towels. The isopropyl-alcohol bath tends to splash. Moving the part between the printer, bath, and curing station yields a lot of dripped resin. The whole process is messy and takes up a lot of space.
The worst thing FDM printer users have to deal with is a spaghetti-like blob of plastic they collect and throw away.
Build Size (Winner: FDM)
FDM printers tend to have build volumes of 200mm x 200mm x 200mm or bigger. Because FDM printers consist of a hot end and nozzle mounted to a linear gantry, they are reasonably easy to scale up; printers with axes sizes of 400mm or more can be bought for less than \$1000.
Because economy SLA printers utilize LCD screen display technology to filter and direct the UV light, the X and Y axis sizes are usually a non-square ratio of 16 to 9. Displays themselves are typically made at fixed resolutions and as they get bigger, the detail of the print goes down. Even \$10,000+ laser based SLA printers don't necessarily exceed 200mm on both the X and Y axis.
Expect SLA printer build volumes to be smaller than FDM build volumes.
Raw Material Toxicity (Winner: FDM)
A roll of FDM filament is pretty innocuous. It isn't toxic to touch, doesn't off-gas smelly vapors, and doesn't make a mess. It just sits there. Raw filament scraps can be thrown away in a regular garbage can.
Most resin manufacturers recommend that users wear gloves, a respirator, and safety glasses while handling them. Uncured resins cannot be thrown away or poured down the drain (they must be cured first).
Raw Material Shelf Life (Winner: FDM)
When properly stored, raw FDM filament can last for a decade or longer without degredation.
Resins are typically rated for a shelf life from one to two years. As resins age they degrade, don't cure as well and eventually stop making good parts.
Raw Material Cost (Winner: FDM)
By weight, FDM filaments can be 2x cheaper than SLA resins for the same strength.
Layer Quality (Winner: SLA)
FDM layer heights are typically between 0.1mm and 0.4mm. These layers are readily visible and cause a coarse texture on prints.
SLA layer heights are usually between 0.025mm and 0.1mm. The layer quality is outstanding and layers are very difficult to visually observe or feel.
Wall Quality (Winner: SLA)
The X and Y axis accuracy of SLA parts is determined largely by the accuracy of the display or laser curing the resin (which is normally very good). SLA wall surfaces usually have excellent finishes.
During the FDM process, the printer needs to sling a hefty heater and nozzle around a print bed while extruding plastic. This regularly yields ringing, seams, bubbles and other defects in the walls of prints.
Strength and Toughness (Winner: FDM)
Because they are thermoplastics, FDM materials behave mechanically similar to injection molded parts; they will be more familiar to those who have worked with mass manufactured plastics.
SLA parts can exhibit strange creep and elongation behaviors under load and often fail catastrophically due to brittleness.
It is important to acknowledge that both FDM and SLA processes have material options with comparable strength and toughness. Still, standard FDM materials tend to outperform standard SLA materials. Engineering grade FDM materials tend to outperform engineering grade SLA materials.
Strength Consistency (Winner: SLA)
Because of the fine layer lines and the secondary cure process after the part is complete, SLA parts have a more uniform strength regardless of loading direction. Parts with uniform directional strength are called isotropic.
Due to the stacking of thick layers, FDM parts show extreme differences in the Z vs X/Y axes. Parts with non-uniform directional strength are called anisotropic.
One important caveat to the uniformity of cured resins is that the part must be well-cured throughout. Parts that are dark colored or very thick such that that UV light is unable to penetrate and cure the entire part will show a great deal of strength non-uniformity.
Heat Resistance (Winner: SLA)
Because they are thermosets and not heat sensitive, cured resin parts don't appreciably melt or warp when exposed to heat. However, under high sustained heat, SLA parts still degrade and crack to pieces.
FDM filaments vary widely in heat resistance. Beginner friendly filaments are typically not heat resistance (they warp badly in a hot car) but with engineering grade filaments, a high degree of heat resistance can be obtained.
Ultraviolet [UV] Resilience (Winner: FDM)
SLA parts are hardened by exposure to UV light, but even after curing is complete, they remain sensitive to sunlight (which contains a lot of UV light). Continued exposure to UV light after curing causes cured resins to become brittle and fall apart. SLA prints are not recommended for use in environments (indoor or outdoor) exposed to regular sunlight.
FDM filaments are more UV resilient though will discolor and eventually become brittle. There are FDM filaments that are extremely UV resistant and intended for outdoor use.
Environmental Impact (Winner: None)
FDM enthusiasts often brag about how Polylactic Acid (PLA) filament is compostable while cured resins and other FDM filaments will last for hundreds of years. While technically true, composting PLA filament requires an industrial composting process that is not found naturally anywhere on earth. Very little PLA filament actually gets composted.
FDM enthusiasts also often brag about how thermoplastic filaments can be remelted and recycled into new filament while resins cannot. While technically true, recycling filament comes with a financial and organizational burden that few take up.
Today, neither SLA or FDM 3D printing are environmentally friendly. Buying products from the store also isn't enviornmentally friendly (so much plastic packaging). Driving a car? Also not environmentally friendly. Even electric cars often get energy from burning gas at a power plant.
Other 3D Printing Processes and Materials
FDM and SLA are the most common 3D printing processes but they aren't the only options. 3D printing can be accomplished through other processes and materials. This list is not exhaustive but is intended to highlight a few less common 3D printing technologies.
Fused Deposition Modeling Metal (FDMM)
It is actually possible to 3D print metal parts, even at home! Doing so requires a special metal filled filament and a printer with a large diameter hardened steel nozzle (metal filaments are abrasive and destroy small brass nozzles common on consumer 3D printers). The metal filament is usually made up of metal powder infused into plastic filament, 80% or more metal by weight.
After the part is printed, it needs to be placed in a sintering kiln (1000$^{\circ}$C to 2000$^{\circ}$C). During the sintering, the plastic is burned away while the metal melts and fuses together.
While FDM 3D printing metal is a neat flex, it's really not very common. Most who are looking to 3D print metal want to do so because they want strong and robust parts without the expense or knowledge of metal cutting or casting. In this regard FDMM is a bit of red herring.
The FDM 3D printer is the cheapest part of metal 3D printing. Sintering kilns are normally \$1k+. The metal filament is typically \$150-\$300 per kilogram, having a print fail late in the print while using metal filament feels terrible. Remember, metal is much heavier than plastic so each roll produces less prints.
Selective Laser Sintering (SLS)
Selective Laser Sintering (SLS) uses a laser to melt powdered material. This process yields prints with more uniform strength and less layer lines than FDM. Because the prints remain encapsulated in the uncured powder, this process can be used more productively for mass production than SLA or FDM. Selective Laser Sintering can also be used on more exotic materials like metals and ceramics.
SLS printers are typically around \$30,000+ so you won't find them in the average maker's shop. There are many companies that own these printers specifically to offer printing services to customers; this is how most have their parts made by SLS.
Multi Jet Fusion (MJF)
Multi Jet Fusion (MJF) is a proprietary 3D printing process pioneered by HP. MJF uses ink that is heated to bind powdered material (usually Nylon, which is a great material for parts) in a manner functionaly similar to SLS. Like SLS, MJF is viable for making a lot of parts and the prints have uniform strength and small layer lines.
MJF printers (available only from HP) cost \$50k-\$100k so aren't going to be found in a typical maker's shop. Most have their MJF parts made by companies that offer 3D printing services to customers.