Setup A Coding Environment

Prerequisites- Introduction to Coding
Integrated Development Environments (IDEs)
Although code can be written anywhere (even with pen and paper), developers typically write code in a tool called an Integrated Development Environment (IDE). IDEs provide a lot of benefits like code interpretation, debugging, autocomplete, and compile capabilities.
Standard coding for iOS requires Xcode, Visual Studio is helpful for making Windows applications, and QT can be used to make cross-platform applications for Windows, Mac, Linux, and more. These IDEs support many different programming languages for different use cases. Some of these IDEs cost thousands of dollars per year.
 [...]
[...]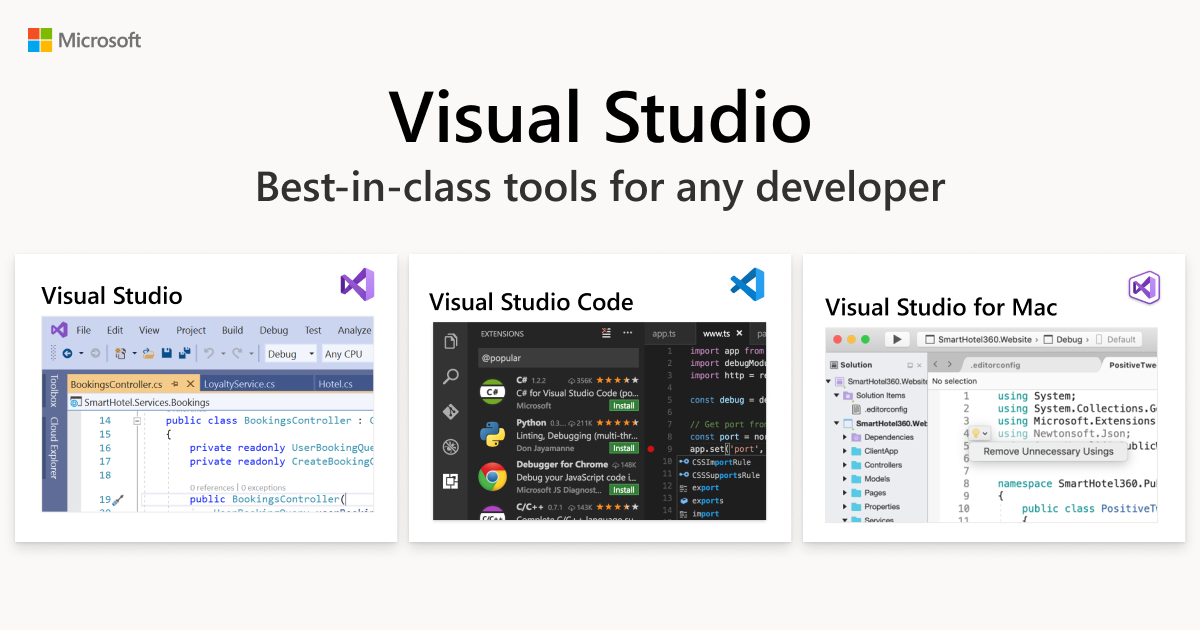
Mechatronics engineers often find themselves working on a ton of different platforms (embedded, desktop, mobile, etc.) needing basic proficiency in many different languages. Visual Studio Code is a free and extensible open-source text editor that has become a very powerful IDE.

I recommend installing and using Visual Studio Code (follow the above link) unless you need to build for a very specific target that Visual Studio Code cannot build for. Even so, being comfortable in Visual Studio Code means that you will be productive in a universal coding environment and can limit the use of specialized IDEs only to actually compiling a program.
Don't confuse Visual Studio Code with Visual Studio. These are two completely different platforms:
- Visual Studio is a paid IDE for software engineers developing applications for Windows. Every tool is geared toward making Windows applications easier to develop.
- Visual Studio Code is a free and open-source editor for engineers using any programming language. C. C++. C#. Python. Dart. Javascript. Embedded Firmware. Artificial Intelligence. Web development. Flutter. Visual Studio Code is open and extensible to support it all.
Visual Studio Code is compatible with Windows, Mac, and Linux for both ARM and x86-64 CPU architectures. Visual Studio Code isn't available for iOS or Android, these devices just aren't very practical for coding.
In mechatronics.studio content, we will be using Visual Studio Code for all programming unless specifically stated otherwise.
Introduction to Visual Studio Code
Visual Studio Code is a simple application but under the surface lies a ton of customization power. I recommend installing Visual Studio Code and watching the below video from Reynald Adolphe for a short introduction. I don't recommend trying to follow along or duplicate the examples Reynald presents, just watch and try to become familiar with the user interface.
Figure 1: Reynald Adolphe provides a high level introduction of Visual Studio Code.
Introduction to Development Containers
One of the most challenging parts of software development is getting the compiler and dependencies (often called packages or libararies) configured to be able to actually build a program from source code. Package versions, compiler configuration, and target settings are just some of the overhead management challenges that have very little to do with actual coding.
New software developers are often first taught how to install an IDE and to install the packages for their work directly onto their computer. With each new project, more and more packages get installed. Some packages are dependent on other packages and sometimes installing one package requires thirty more dependent packages to also be installed. Eventually, package version conflicts start arising left and right and it becomes a whole ordeal to keep projects straight.
When a software engineer writes code that somebody else actually wants to use and build themselves, that software engineer becomes tech support for helping these users to compile the software on their own computers. Some users have Windows while others use Mac or Linux. If the software engineer's hard drive becomes corrupted, they need to rebuild their development system from scratch.
There must be a better way, right!? There is.
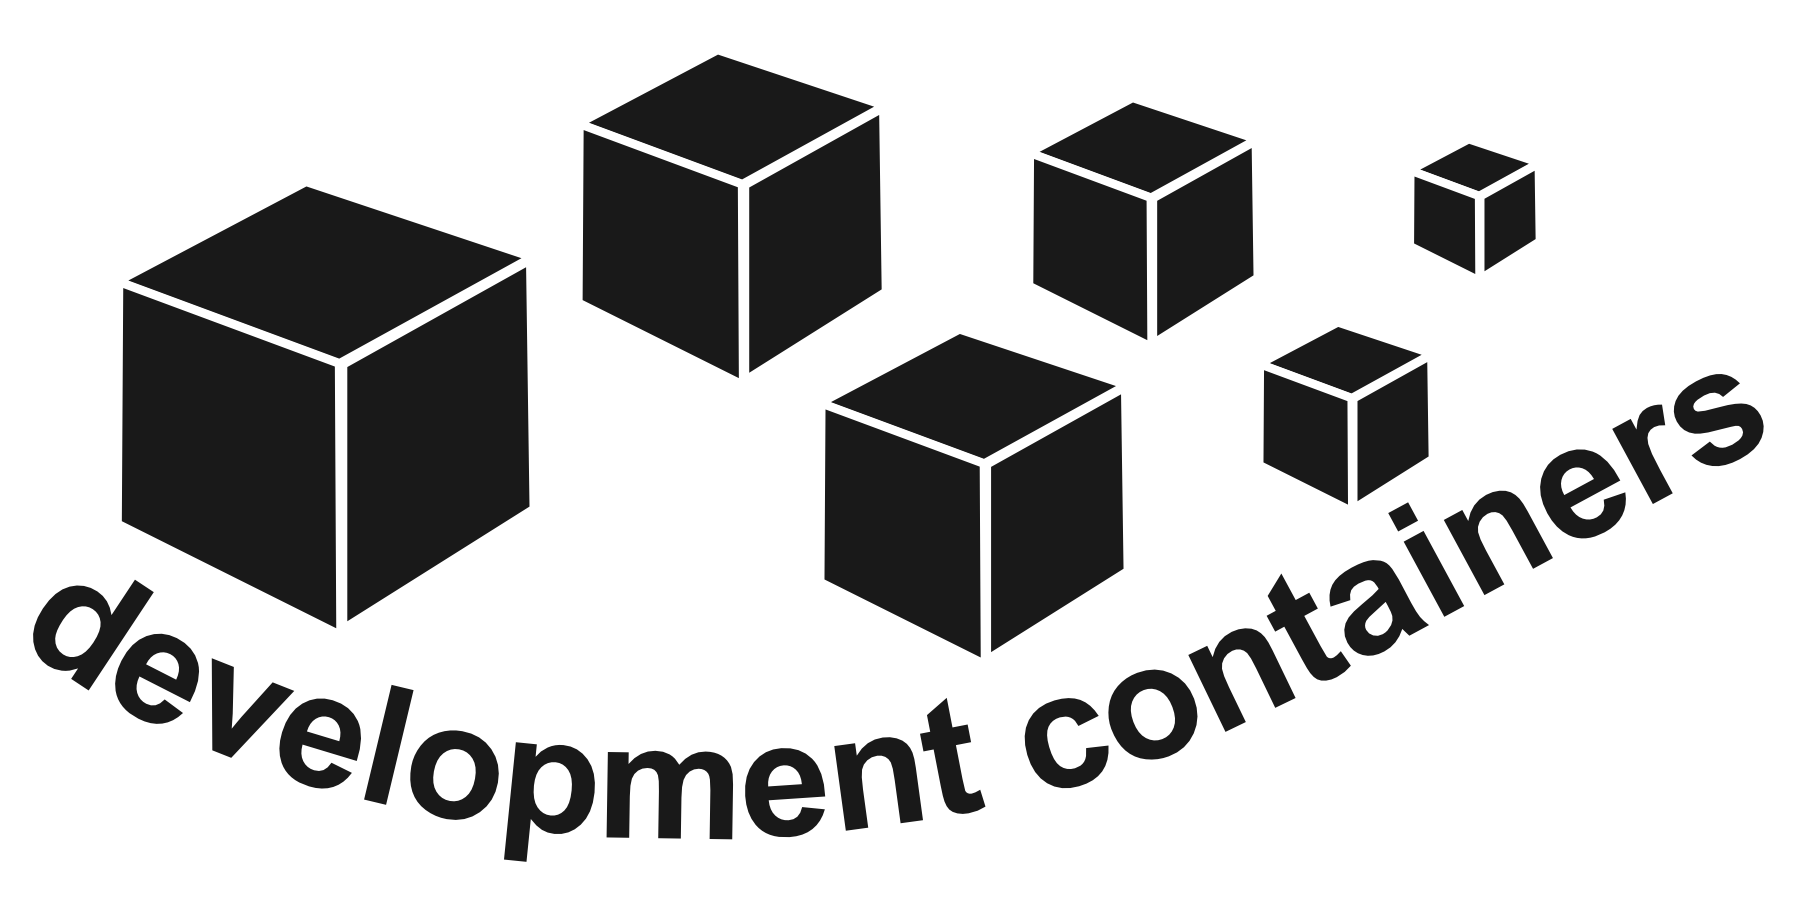
A development container is a self-contained application that contains all the needed packages, compiler, and source code to develop a program. A great development container framework is compatible with all major operating systems (Windows, Mac, Linux) and is easy to share. Getting started developing and building a program is as simple opening the project with a correct development container configuration file inside.
Setup for Development Containers
To setup your computer for development containers, follow the guide below up through the Check your environment section. During this guide, you will be installing Docker and the Dev Containers extension for Visual Studio Code.

At the conclusion of the installation steps, you should be able to follow the steps to run a sample of Node.js code and get the following output in your web browser.

Under the hood, when using a development container, an isolated application is created that self-contains a copy of Visual Studio Code (Visual Studio Code Server), all packages, the compiler, and other tools needed for software development. The main installation of Visual Studio Code connects to the copy of Visual Studio Code running in the container.
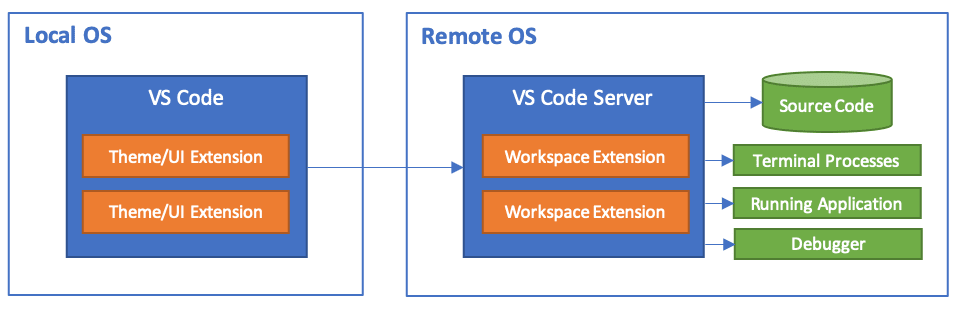
The benefit of this arrangement is that because all the tools for development are in the container, we don't have to worry about these tools cluttering up deep operating system files on our computer and we have a means of setting up our development environment on any computer very easily.
Note that development containers are automatically constructed based on the contents of two files in our code, the Dockerfile and the devcontainer.json. These two files contain all the information needed to generate the container.
Install Github Desktop
Git is a revision control tool for software developers, it helps them to collaborate on and approve changes. The folder that contains the code controlled by Git is called a repository. A deeper dive on Git has merit but is outside the scope of this article. The below link can serve as a jumping off point for the interested reader.
In order for software developers to actually collaborate, Git repositories are typically located in the cloud and accessible from any device with an internet connection and sufficient security permissions. Many service providers offer to host Git repositories including GitHub, GitLab, Bitbucket, and more. You could even host your own Git repository if you were so inclined.
I have used GitHub a great deal and it will be the Git repository hosting service for mechatronics.studio content. GitHub Desktop provides a reasonably good visual user interface for accomplishing basic Git functions.


Building your first C++ App
In the past, building a C++ app involved separately installing an IDE, compiler, and other tools specific to the programmer's computer. With Visual Studio Code and Development Containers, setting up a software development system has never been easier.
On the GitHub Desktop main screen, press the "Clone a Repository from the Internet..." or navigate to the File menu and select "Clone Repository..."
Select the option for URL and enter the below line:
microsoft/vscode-remote-try-cppThe Local Path can be left as default but make sure you can find it in your file explorer; this will be needed in a moment.
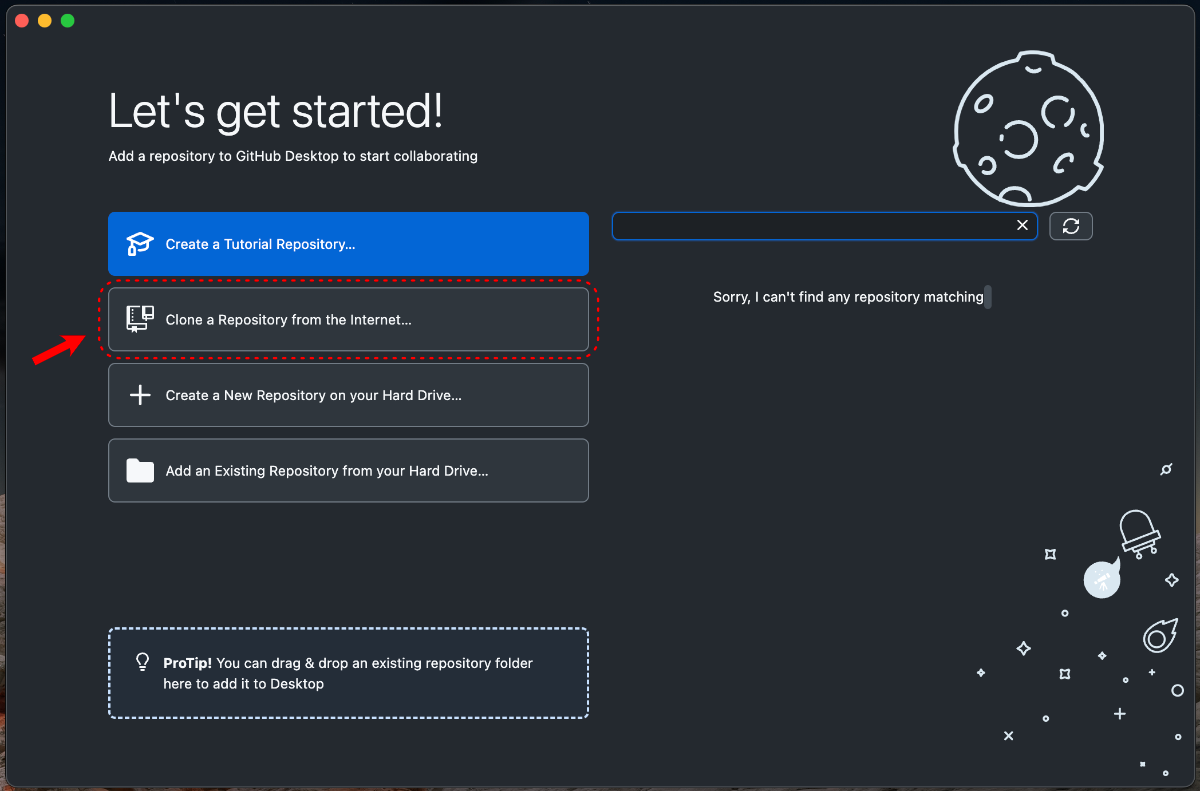
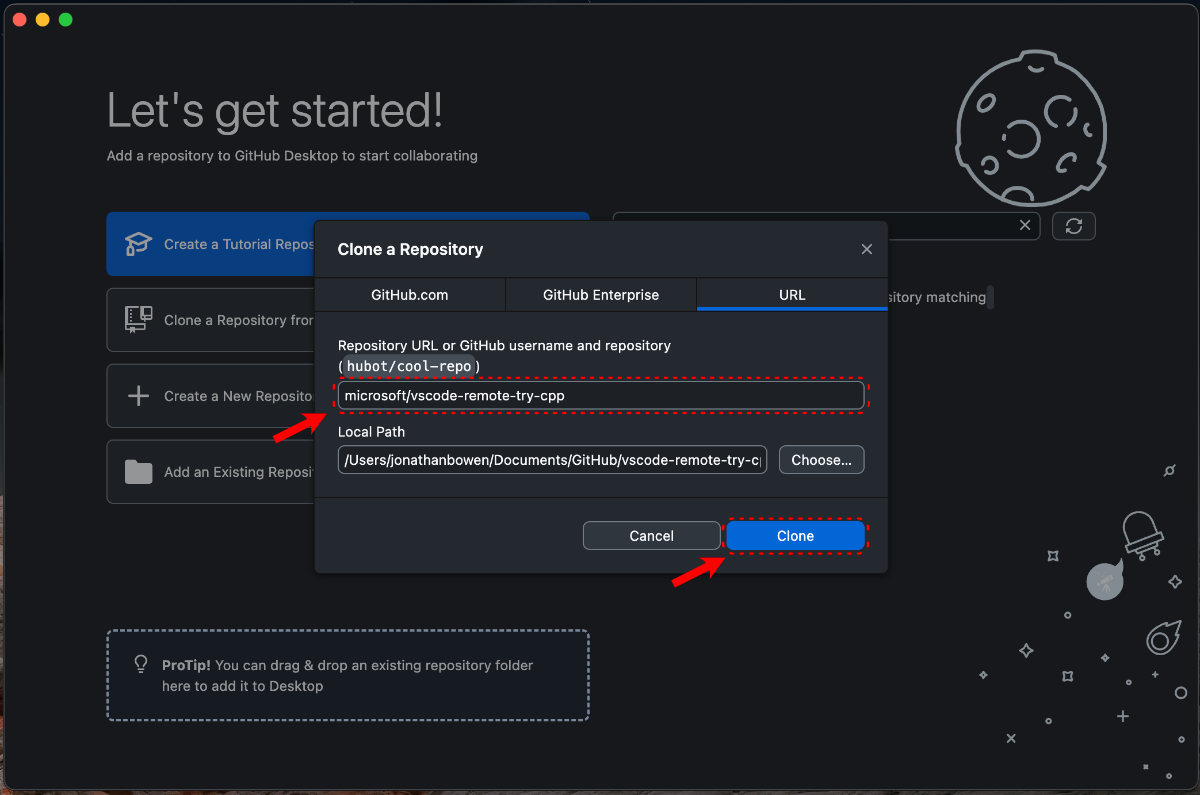
Figure 5: Left- GitHub Desktop home screen | Right- GitHub Desktop repository cloning screen
After GitHub Desktop has finished cloning, open Visual Studio Code, click on the search bar and type the below command:
>>Dev Containers: Open Folder in Container...If you are manually typing, autocomplete will show and allow you to select the command from a drop down before you've finished.
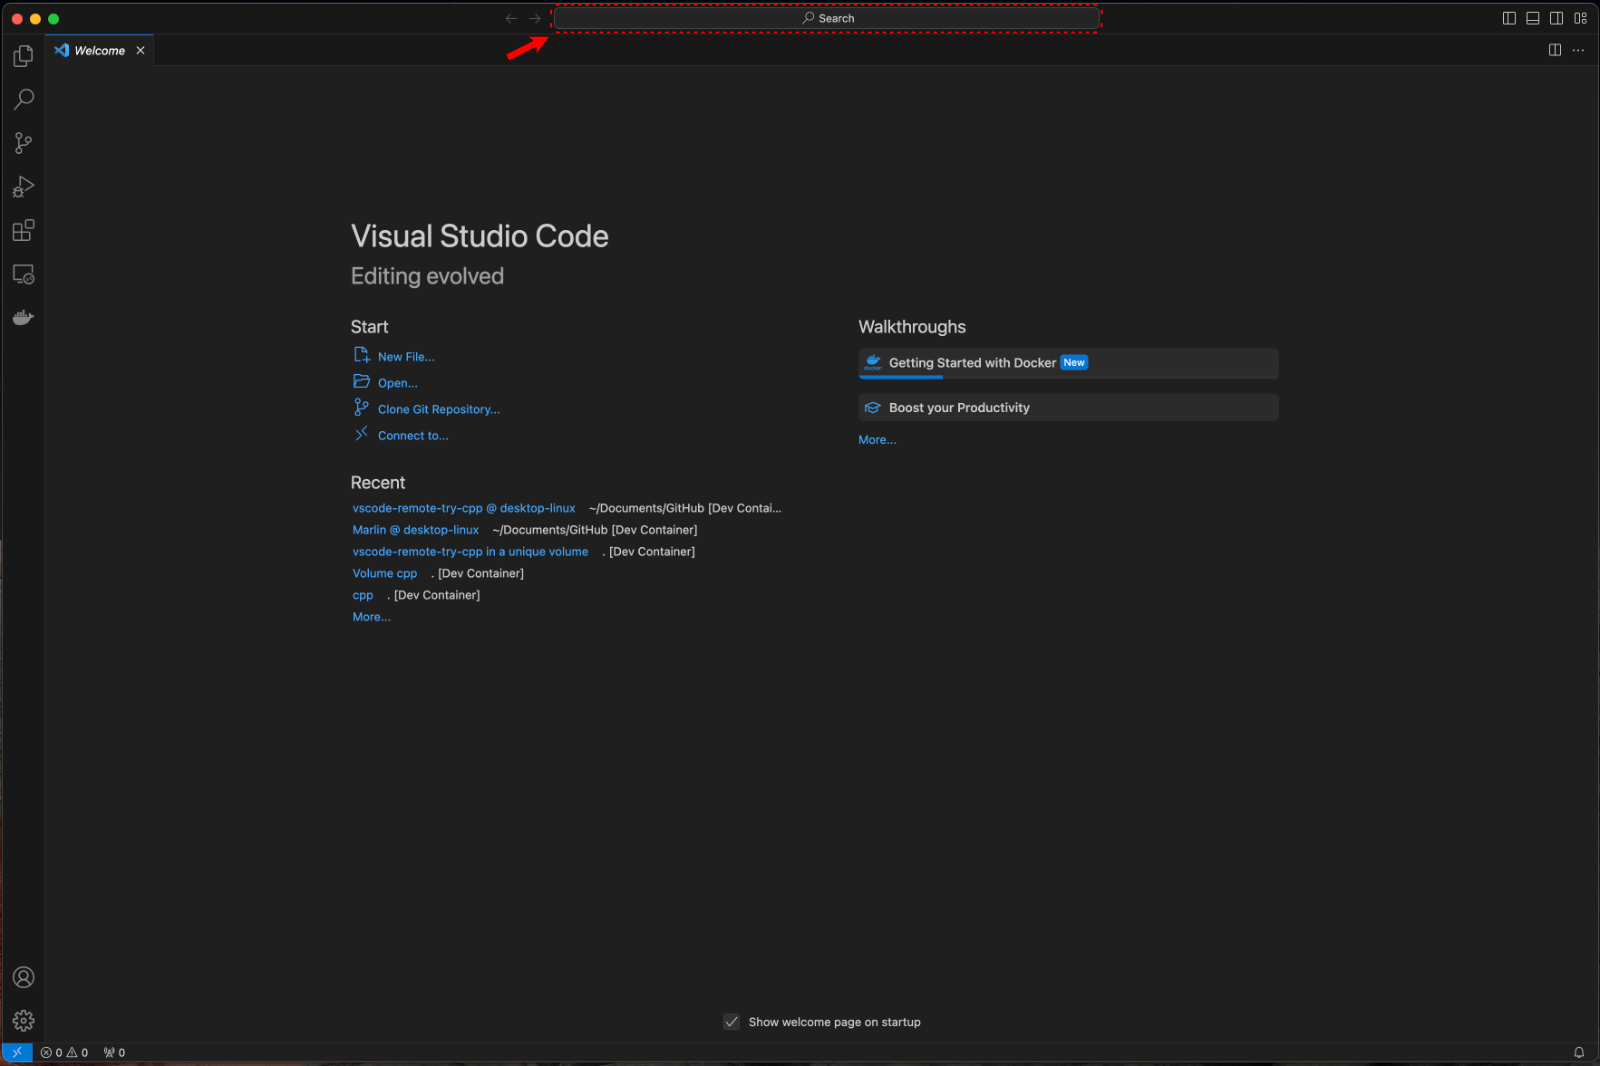
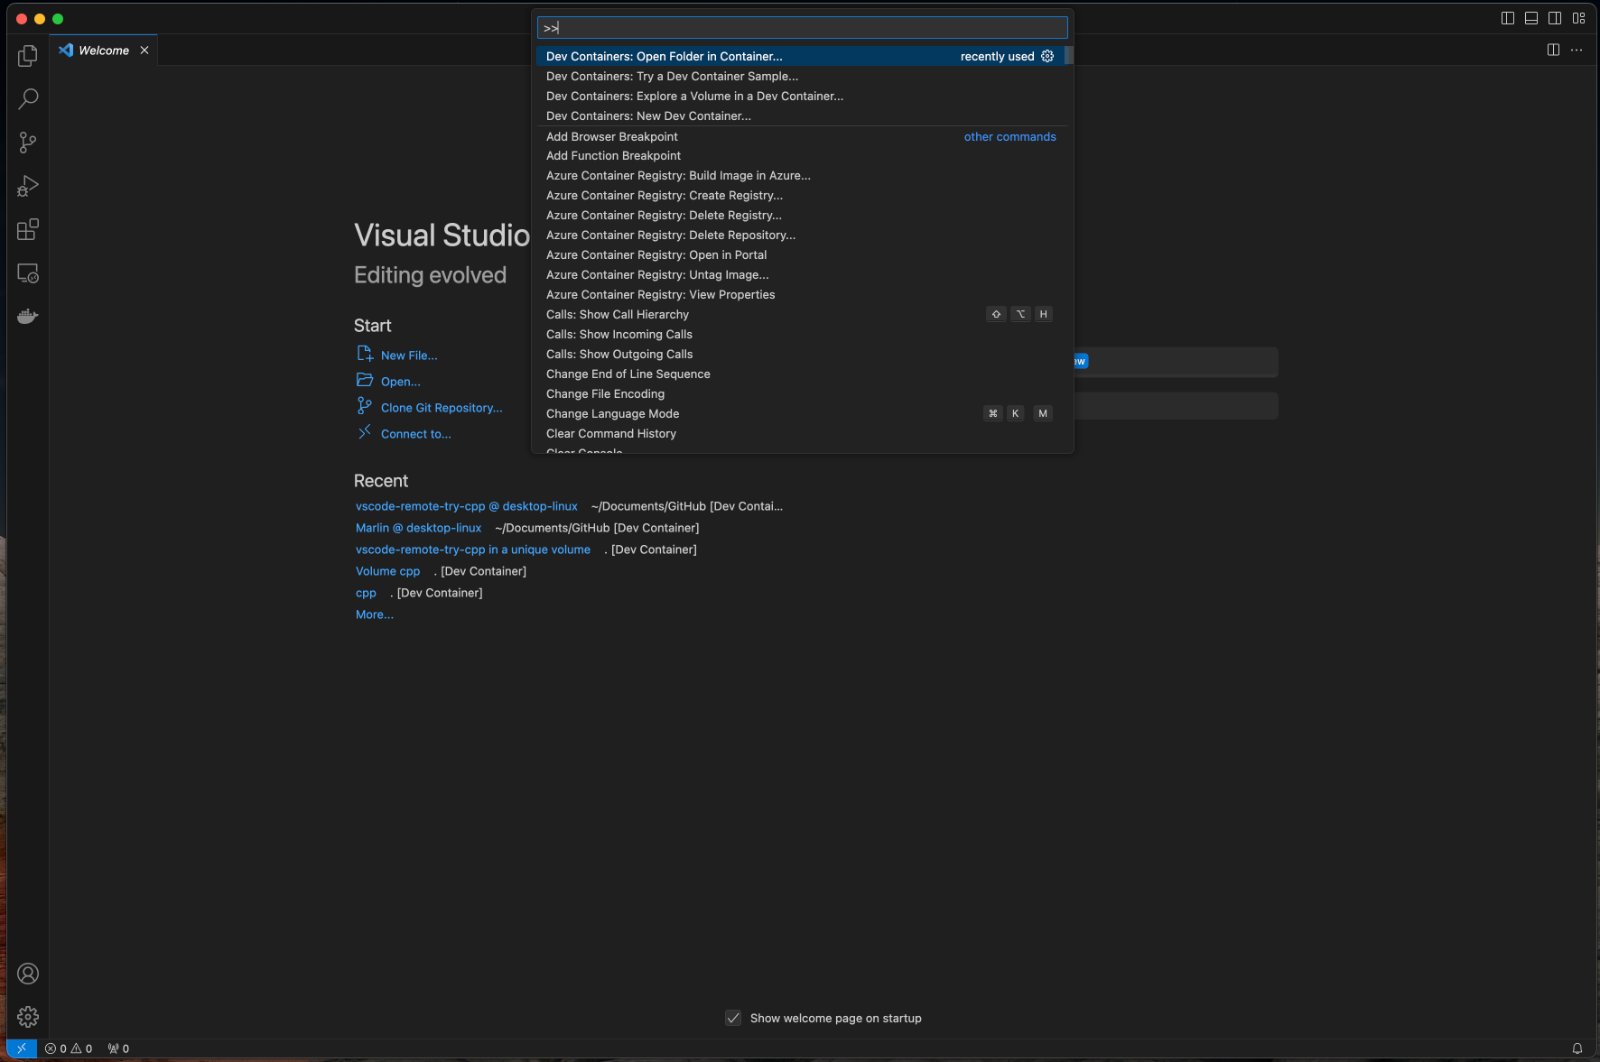
Figure 6: Left- Highlighted search/command bar in Visual Studio Code | Right- Typing commands in Visual Studio Code
After selecting the command, navigate to the folder that contains the cloned repository and select "Open."
Open the "main.cpp" file by clicking on it in the file explorer on the left hand side.
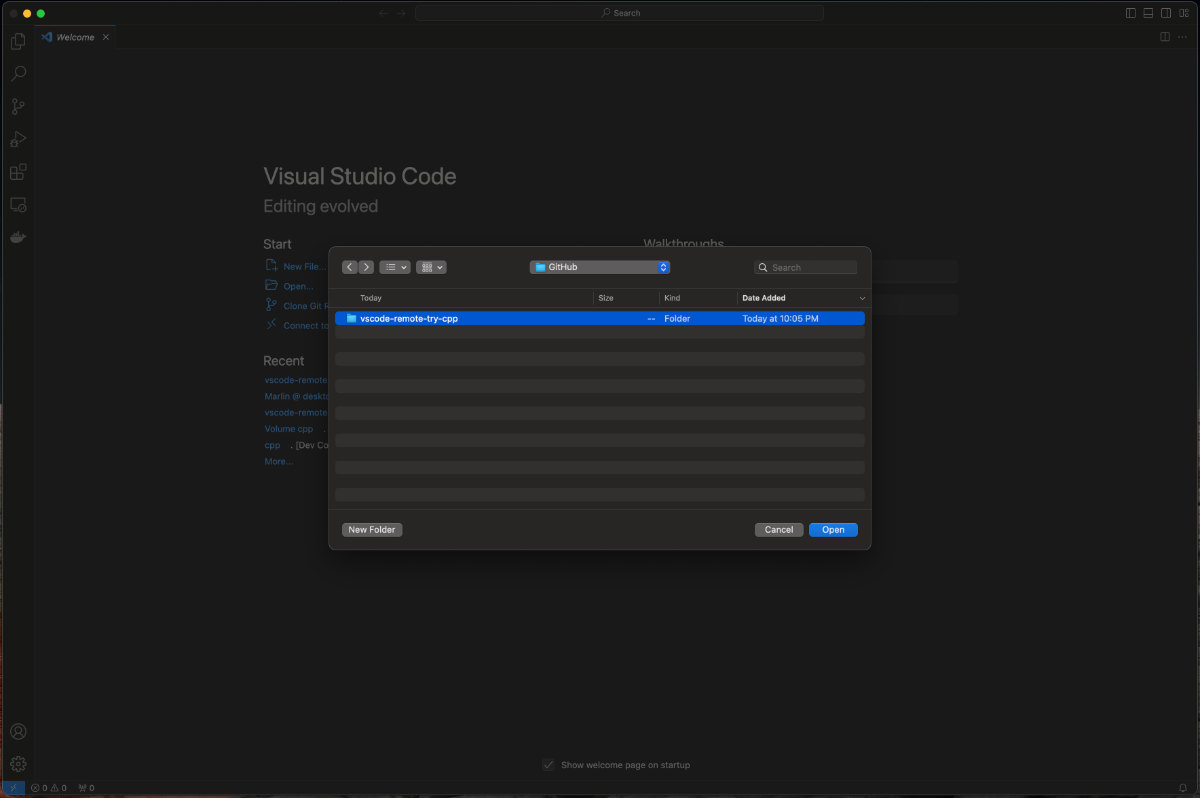
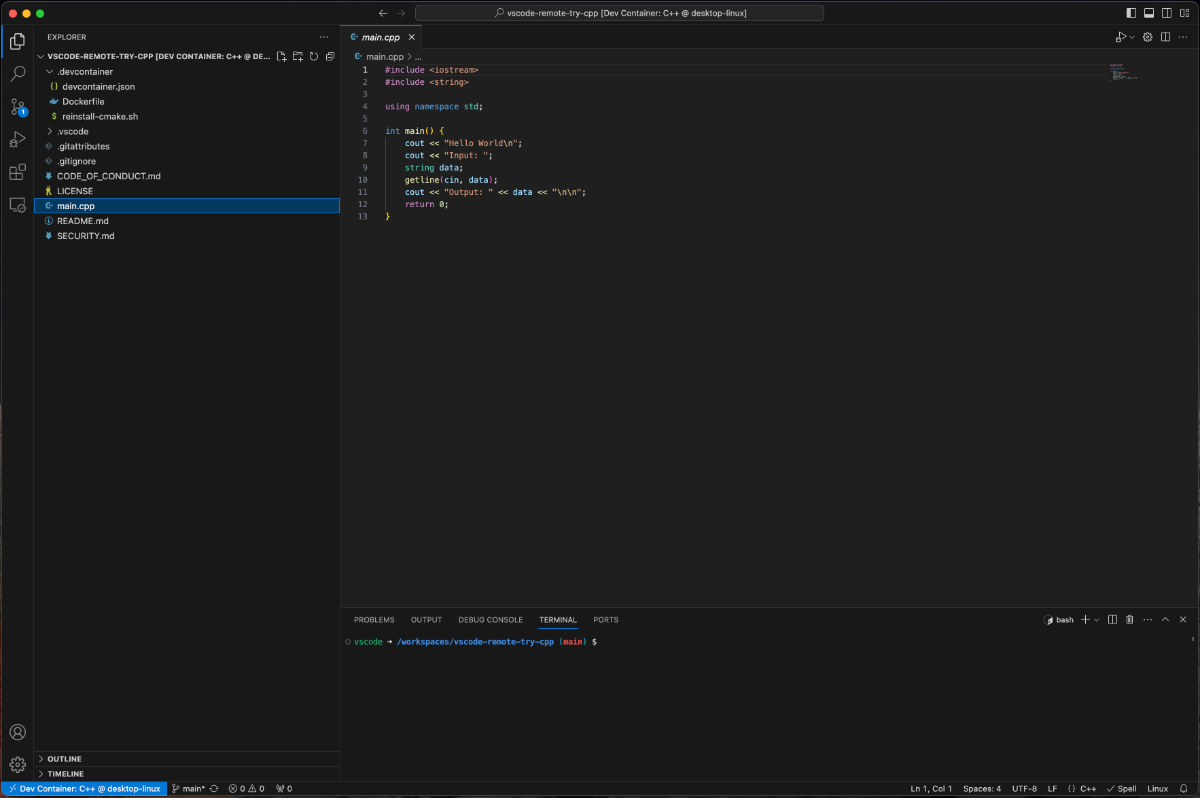
Figure 7:Left- Navigating to location of cloned repository in Visual Studio Code | Right- Cloned respository has been opened in development container
Press the run button in the upper right. You may be prompted to "Select a Debug Configuration." These are the different compiler choices in this container. "Launch Main" is a special configuration where the compiler has already been chosen and a few other compile settings have been set. Select it.
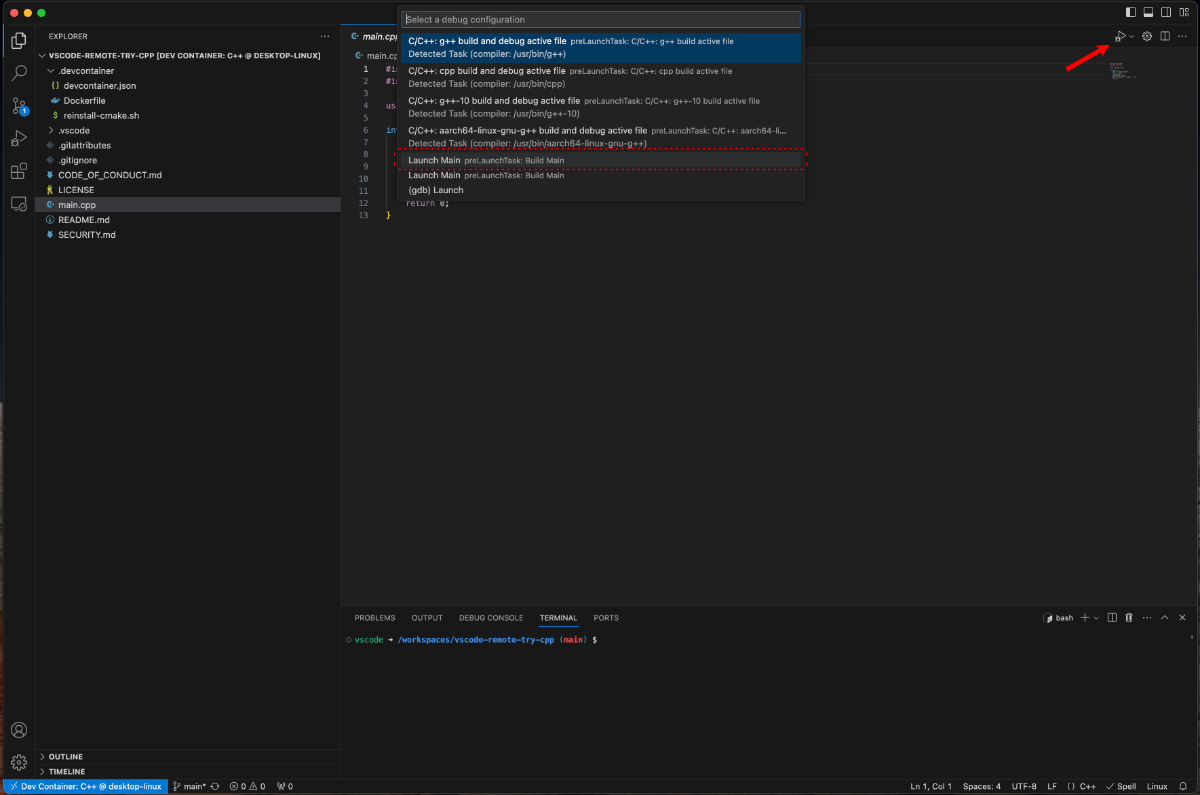
The program will compile and begin running. The "Debug Console" will populate with information. Select "Terminal" to interact with the program.
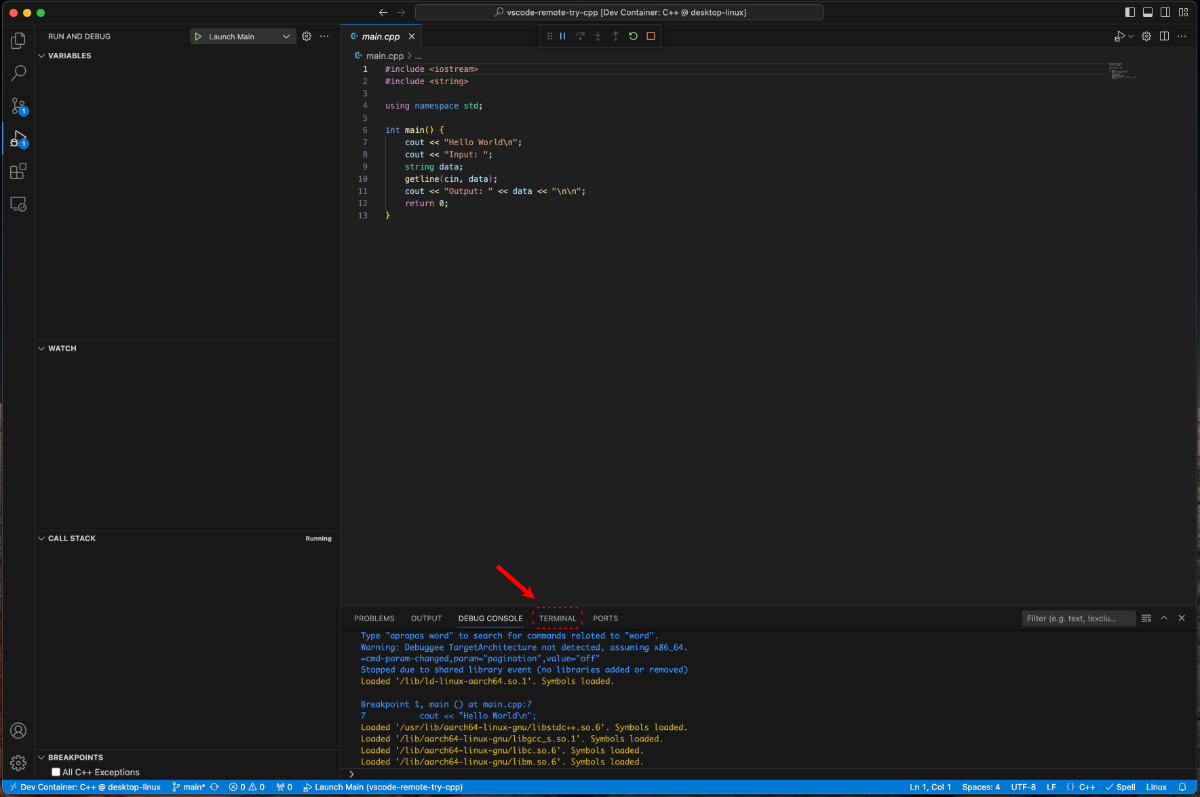
The program is very simple, it outputs "Hello World" and then on the next line outputs "Input:" and waits for user input.
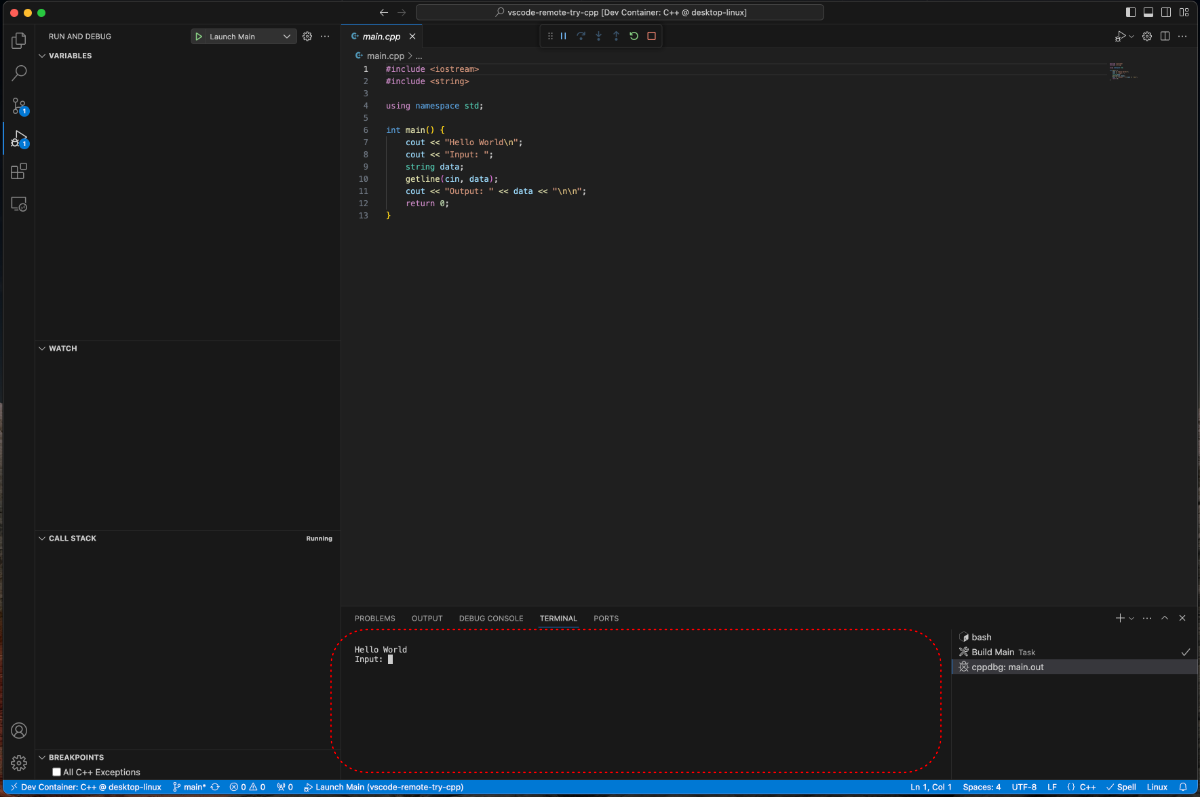
Type in something, like "Hello!" and hit enter on your keyboard.
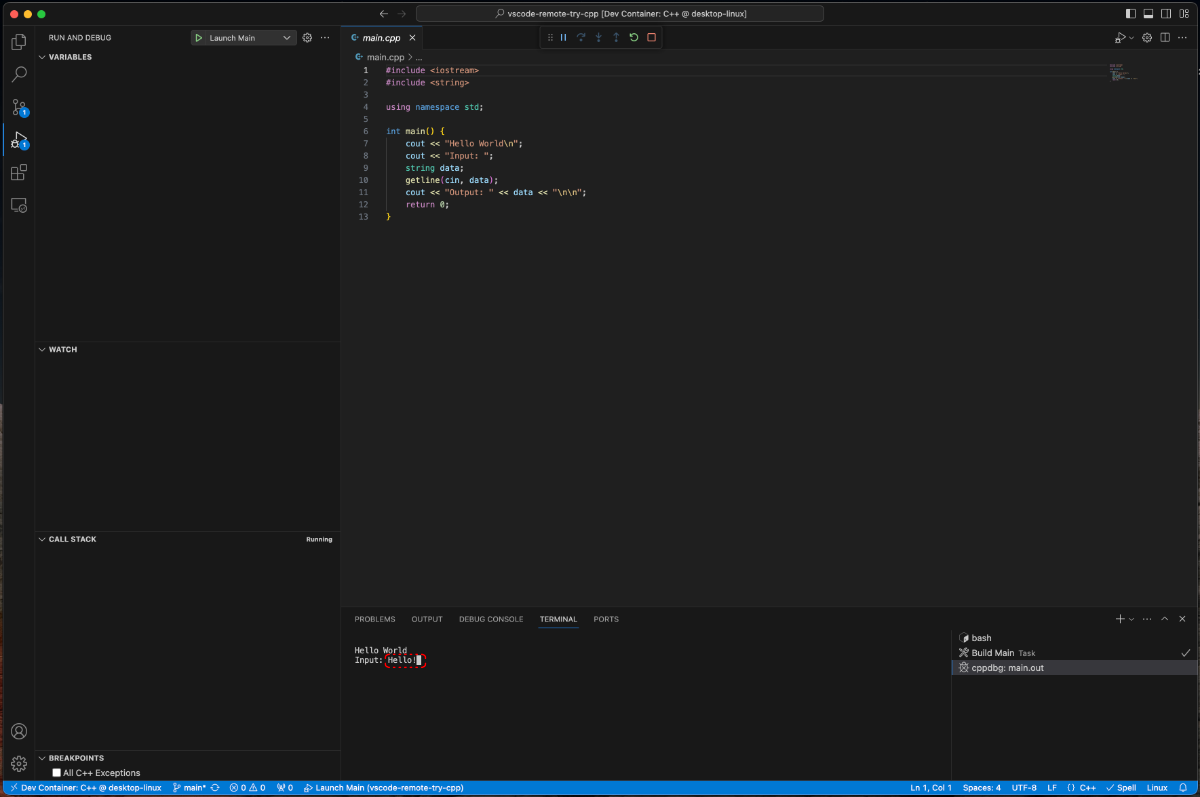
The program will echo back "Output:" followed by whatever you entered.
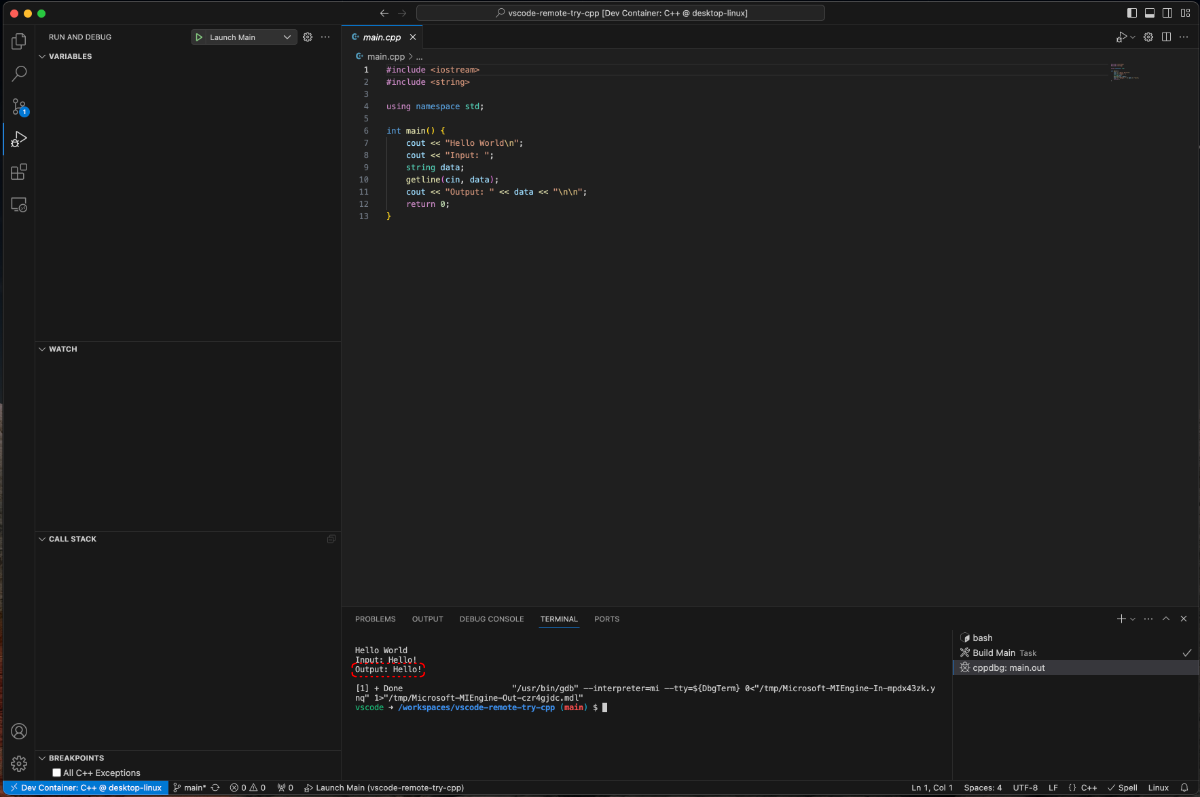
The program then exits.
Final Thoughts
Congratulations! You have installed an IDE (Visual Studio Code), setup Visual Studio Code to use Development Containers, and run a couple of development container examples in Node.js and C++. At this point, you are now prepared to follow the examples on mechatronics.studio.